Getting Started with Your New Nintendo Switch 2
Whether you’ve navigated the world of pre-order websites or found luck in-store, congratulations on acquiring your Nintendo Switch 2! However, before diving into your gaming escapades, a few important setup steps are essential. Although Nintendo is recognized for its user-friendly interfaces, there are specific considerations to keep in mind. For instance, the data transfer from your original Switch can only occur during the setup phase. If this step is overlooked, resetting your console will be necessary for another attempt, or you may find yourself moving your games and save data manually later.
This guide will streamline the setup process for your Nintendo Switch 2, alongside three additional features for you to configure before playing.
Initiating Your Nintendo Switch 2 Setup
The majority of the setup process is relatively simple, but it’s crucial to follow each step carefully, particularly regarding data transfer.
First, unbox your Switch 2 and insert the Joy-Con controllers into their designated slots. They connect magnetically, making the process much easier than their predecessor. The controller adorned with red accents should go on the right side, and the blue-accented one belongs on the left.
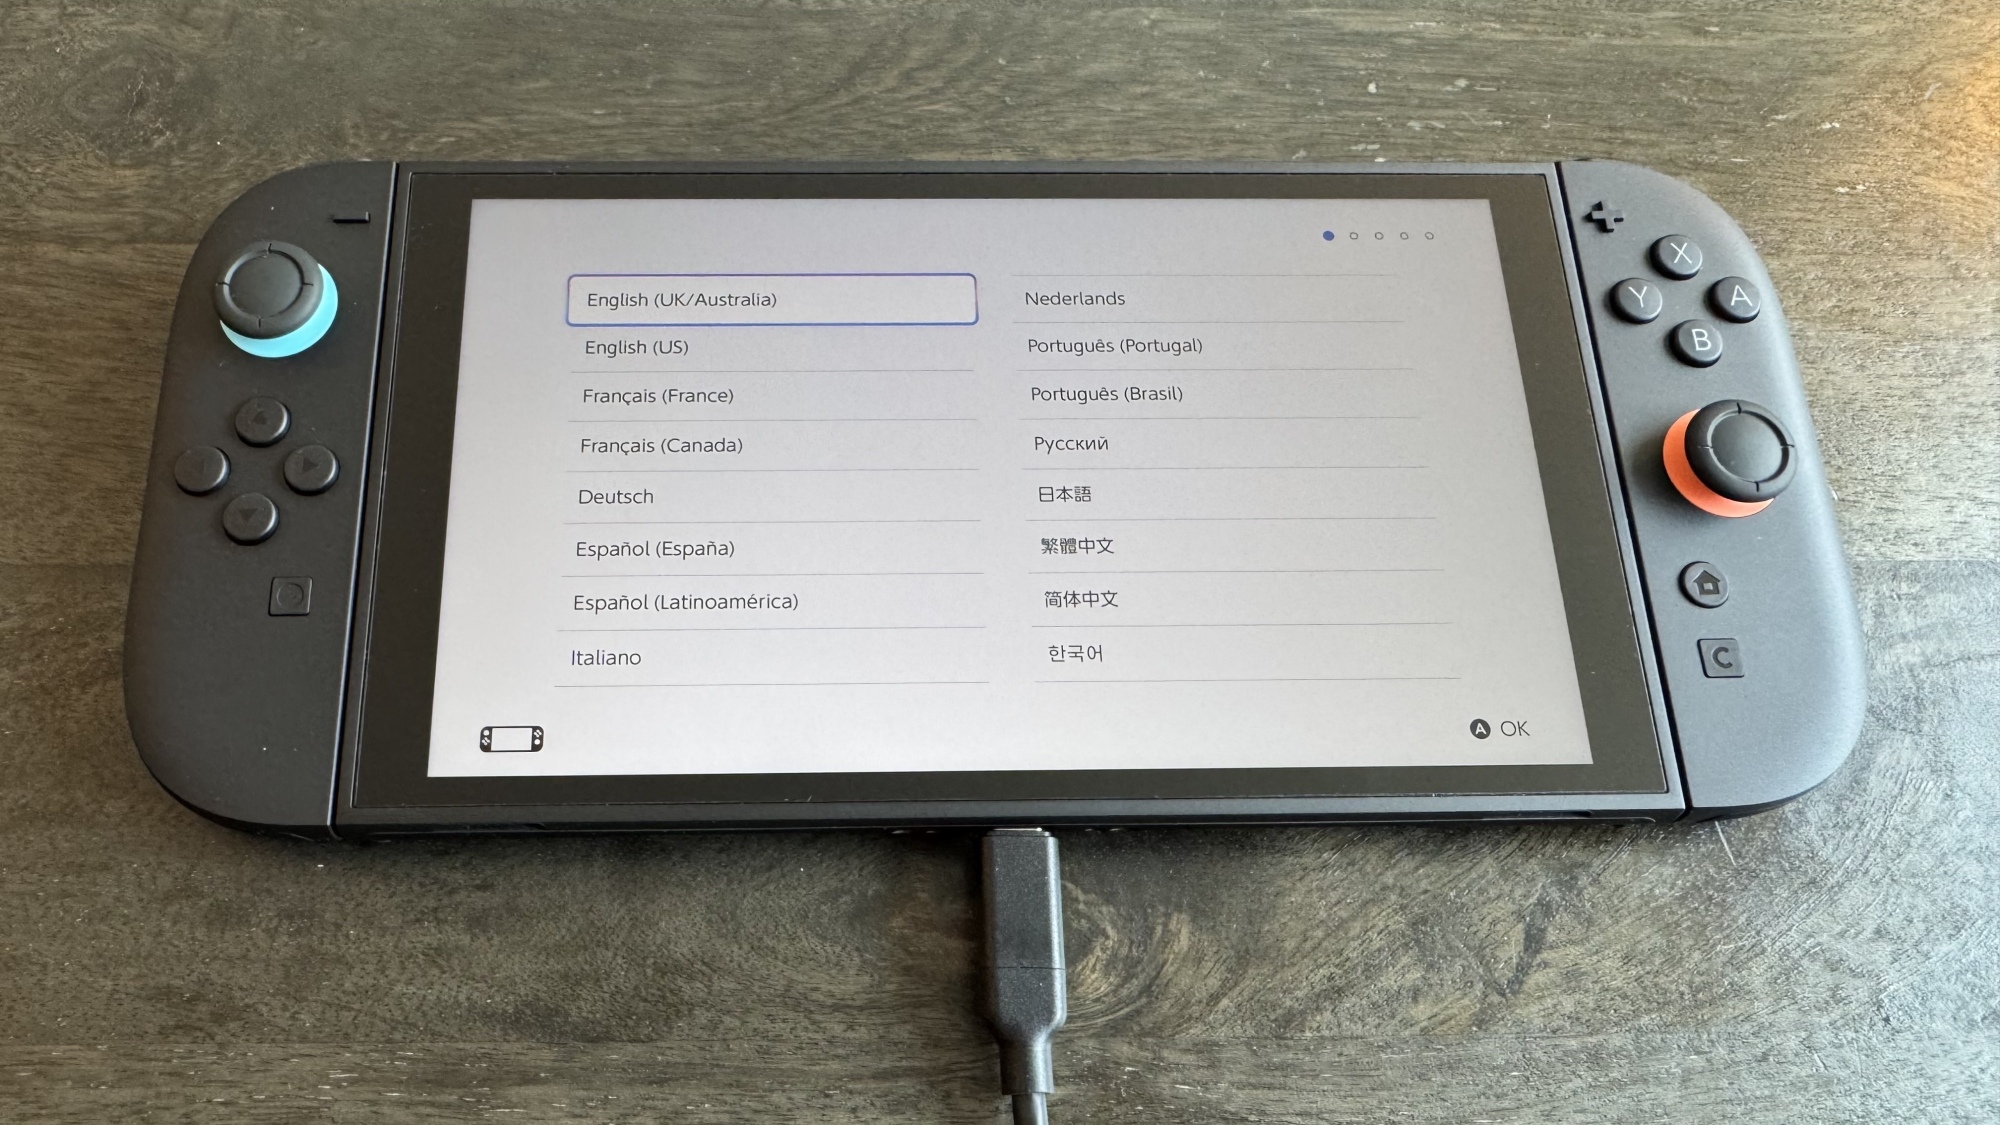
Next, connect your Switch to power using the provided charging brick and cable, and turn it on. After that, select your preferred language and region before agreeing to the end-user license agreement.
A prompt will appear for internet connectivity, allowing you to download the first system update for your console. While this step isn’t mandatory, skipping it (by pressing the X button on the right Joy-Con) will restrict access to many features, including backward compatibility, until the update is complete. It’s advisable to complete this during your initial setup. If you bypass this step, you can always find the update later under Settings > System > System Update.
Once connected and downloading the update, you’ll continue with the setup, choosing your time zone and going through a couple of helpful tutorial screens. These will instruct you on using the console in handheld or docked mode, detail the kickstand and USB-C port usage, and guide you on how to detach the Joy-Con controllers. There’s also an optional tutorial available on connecting your Switch 2 to a television.
If the update hasn’t completed, it will finish during this stage, leading to a significant choice: do you wish to transfer data from your original Switch to your newly acquired console?
Transferring Data from the Original Switch to Switch 2
While setting up the Switch 2, you’ll be given the opportunity to transfer your data from the original Switch, though it comes with certain stipulations.
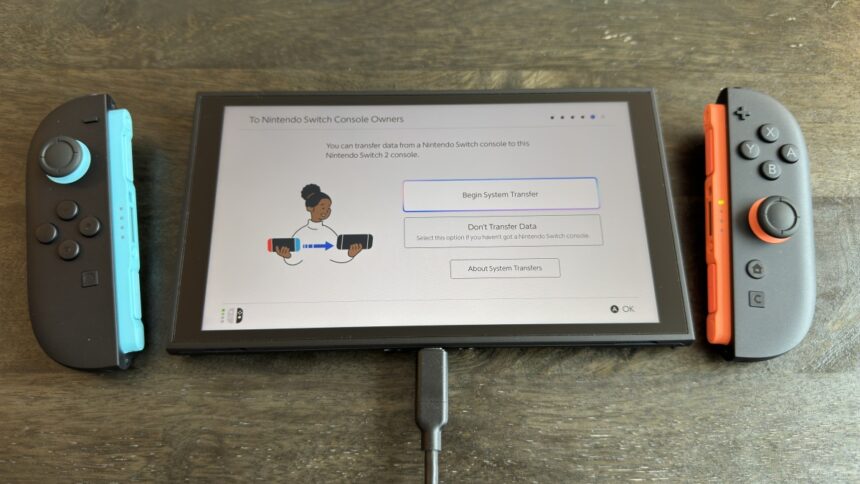
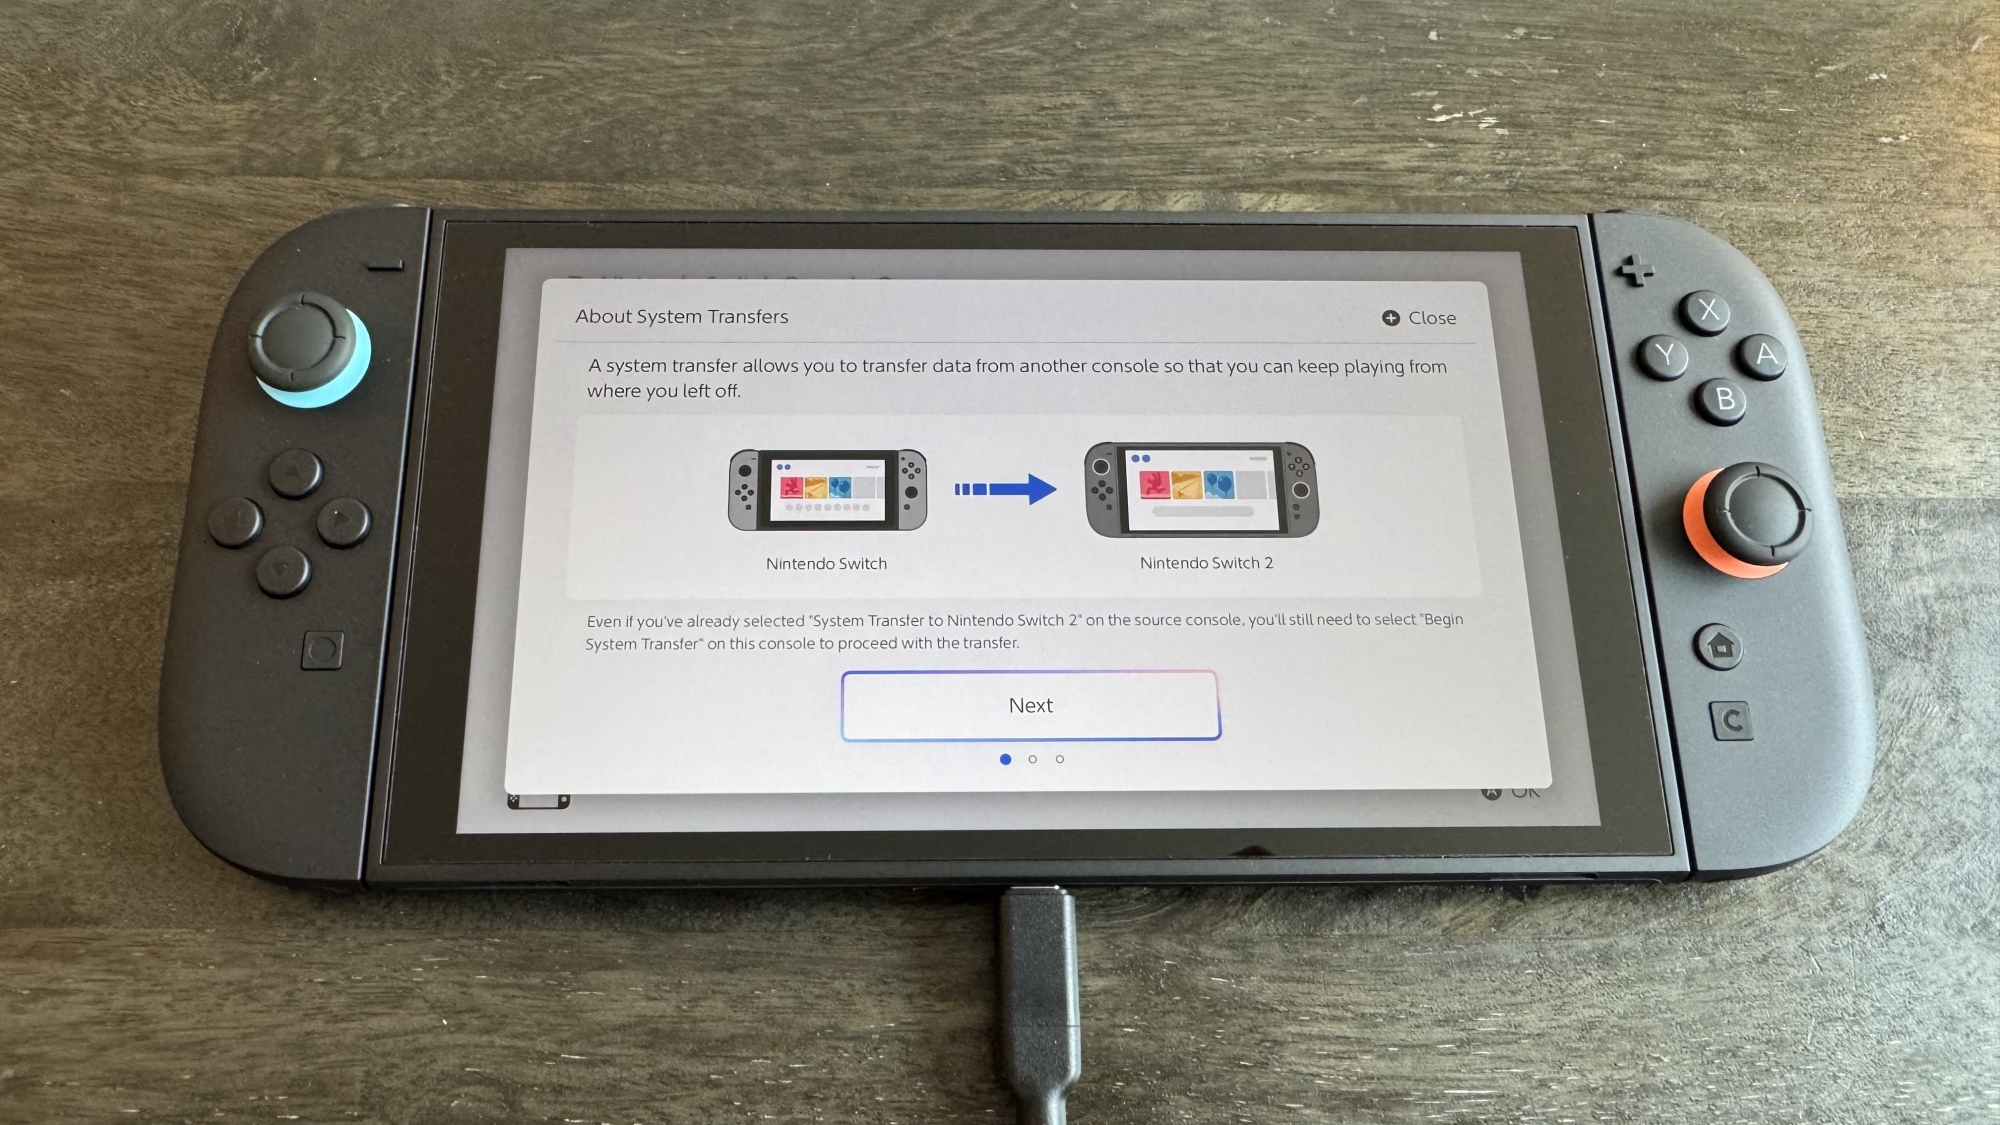
Your readiness to transfer will be indicated by a screen titled “To Nintendo Switch Console Owners,” accompanied by a graphic displaying both consoles. You’ll see options including “Begin System Transfer,” “Don’t Transfer Data,” and a third option that explains the process, albeit with crucial details omitted.
It’s important to note that there are two methods for transferring data. Contrary to some misconceptions, performing a local transfer during setup will not factory reset your original Switch, unless specific precautions are taken beforehand. This is the route Nintendo’s setup will recommend for the majority of users, eliminating fears of inadvertent data loss.
By opting for a local transfer, your data will simply be duplicated to the new device, allowing both consoles to retain the same games and saves. However, be aware that some specific titles, particularly free-to-play games, might experience data loss during the transfer. Thankfully, Nintendo will clearly inform you of any impacted software during this process. Moreover, any screenshots or video captures stored on the original’s microSD card will need to be transferred manually at a later time.
Executing a Local Data Transfer
If deciding to proceed with a local transfer—recommended for most users—select the Begin System Transfer option and follow the prompts. This will involve logging into your Nintendo account while keeping the original Switch powered on and nearby. Initiate the transfer process on your original console by navigating to Settings > System Settings > System Transfer to Nintendo Switch 2.
Utilizing Nintendo’s Servers for Data Transfer
The confusion surrounding factory resets arises from the server-based data transfer option, which will indeed reset your original Switch. This method is best suited for those intending to sell it or for those who will be away during the setup and prefer to configure it from scratch later. Start by powering on the original Switch, visit the System Transfer page, and select I don’t have a Nintendo Switch 2 yet. Be mindful to note the Download Deadline provided. This method allows starting the transfer process before physically possessing the new console!
Then, select Next, followed by Upload Data, and confirm with OK. After that, select Start Initialization to execute the factory reset. The original console will revert to its factory settings, and you’ll need to switch to your new console, click Begin System Transfer, and sign into your Nintendo account. If the system recognizes transfer data available to download from the cloud, the console will guide you through the necessary steps. Remember, however, that failure to download the data before the noted deadline will result in permanent loss of said data.
Choosing to Skip Data Transfer
If you prefer not to transfer data, it’s perfectly acceptable, but keep in mind that this option will not be available later. You will have to manually migrate games and save files instead. Simply select Don’t Transfer Data and proceed to advance to the following step.
Setting Up Users and Parental Controls
Having navigated through data transfers, the most challenging aspect of the setup is behind you. Now, you’ll be prompted to add a user profile. You can sign in using your Nintendo Account to access your Switch Online subscription and downloadable games, or create a local profile. More users can be added later if desired via System Settings > User > Add User.
Next, it’s time to configure parental controls. Like adding users, this can also be managed later via System Settings > Parental Controls. However, there’s no harm in setting them up now by clicking on Set Parental Controls.
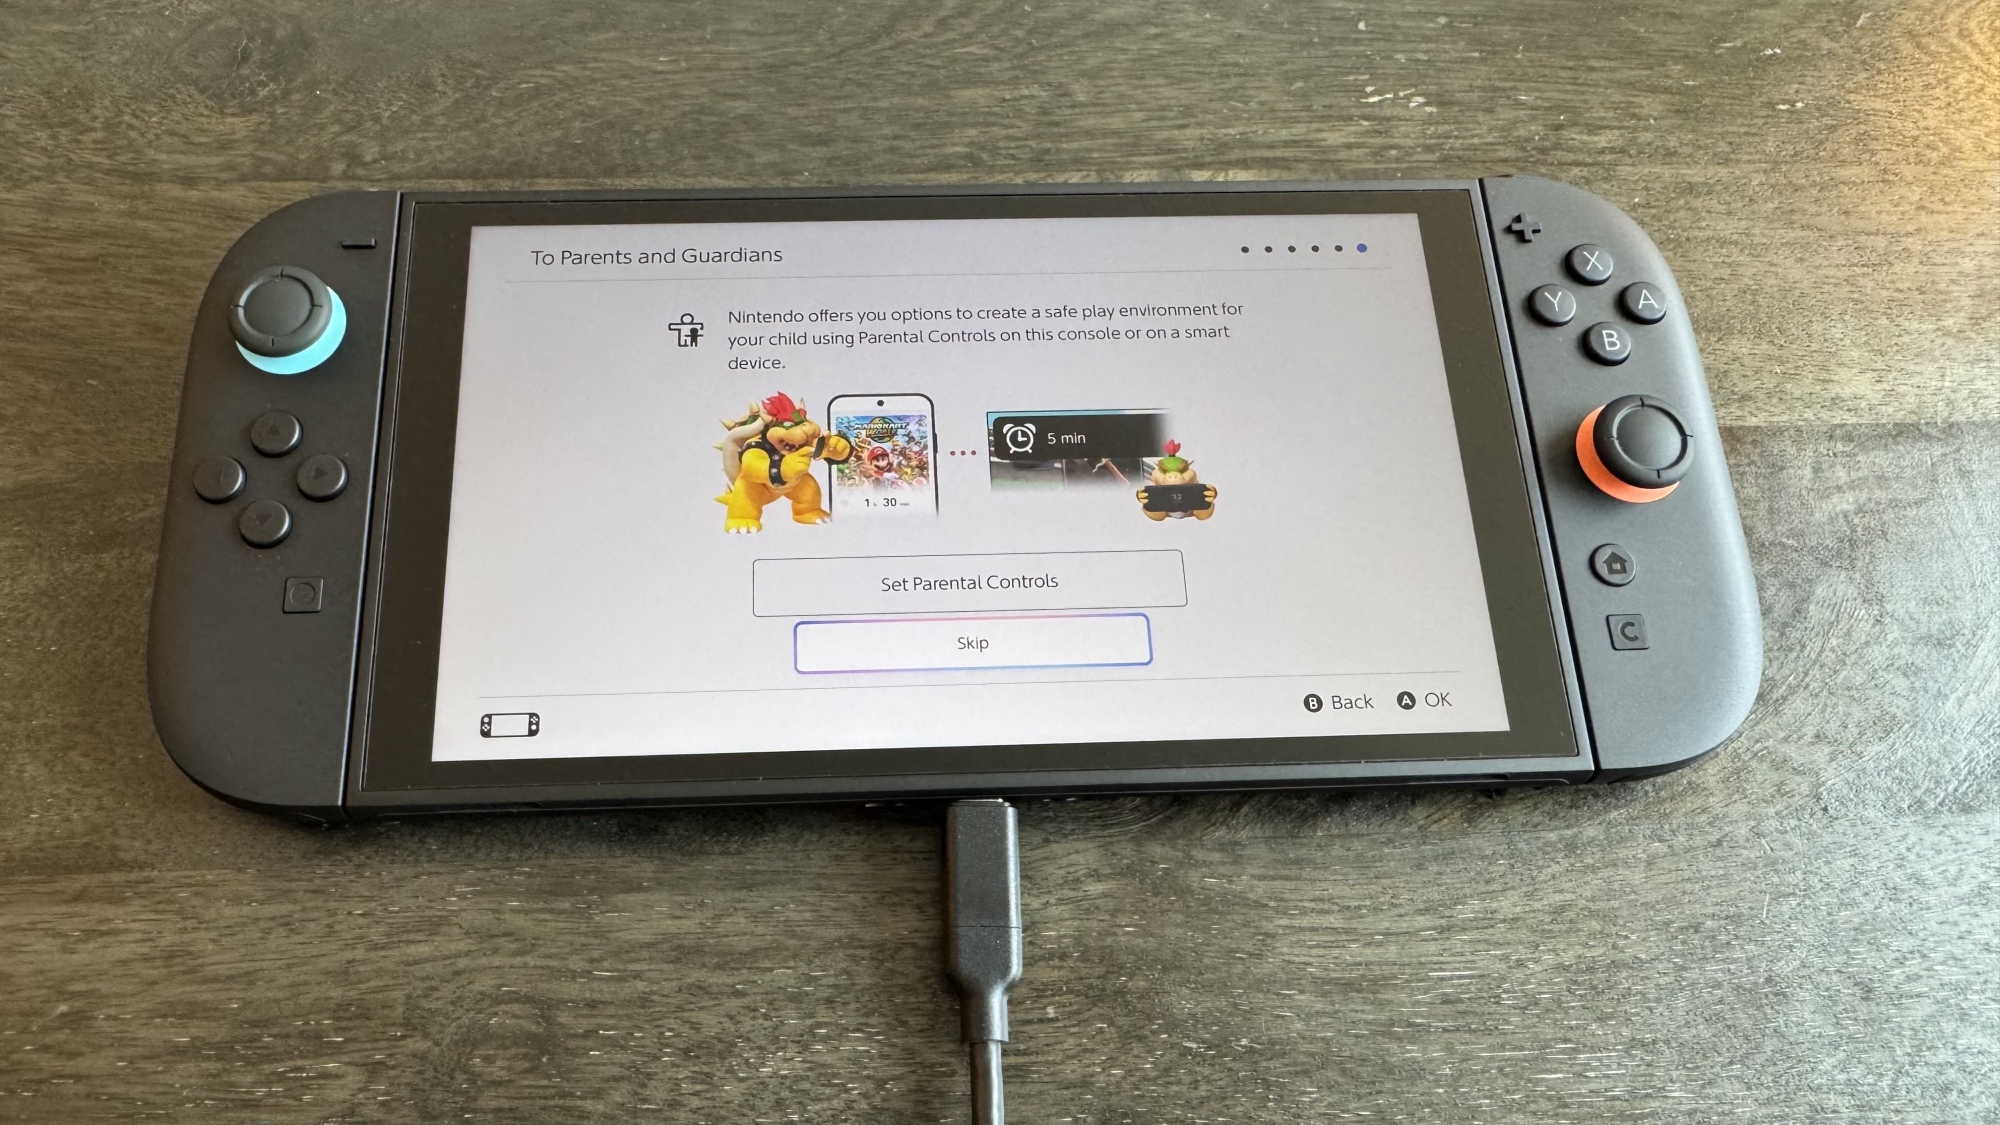
You will discover several options, many of which will suggest employing Nintendo’s Parental Controls app. Alternatively, the console itself offers a limited setting when you press the X button on the right Joy-Con. The console settings enable preset restrictions on games and communication functionalities. Meanwhile, using the app provides greater flexibility, allowing you to set daily playtime limits, bedtime restrictions, and monitoring of play statistics without requiring a Switch Online membership.
To set up parental controls via the app, download it for iOS or Android using the on-screen instructions. Once installed, select the “If You’ve Already Downloaded the App” option. Input the registration code from the app into your Switch 2, then follow the app’s instructions to complete the setup. The steps will vary based on which controls you’re activating, but they are straightforward to navigate.
MicroSD Card Compatibility
One final note regarding microSD cards: unlike its predecessor, the Switch 2 exclusively supports microSD Express cards. While these cards offer faster speeds, they are not as widely available; hence, utilizing your original Switch’s card may not be feasible. To function properly with the Switch 2, the card must display one of the logos shown in the accompanying image. Though this adds a slight inconvenience, using a microSD card is optional, as the Switch 2 has a more ample storage capacity compared to the original.

Additionally, similar to the original model, the microSD slot is concealed beneath the kickstand, in case locating it proves challenging.
Exploring Virtual Game Cards
At this stage, the initial setup is complete, but several features warrant configuration before diving into gaming, namely Virtual Game Cards, Nintendo’s innovative system for managing digital game purchases.
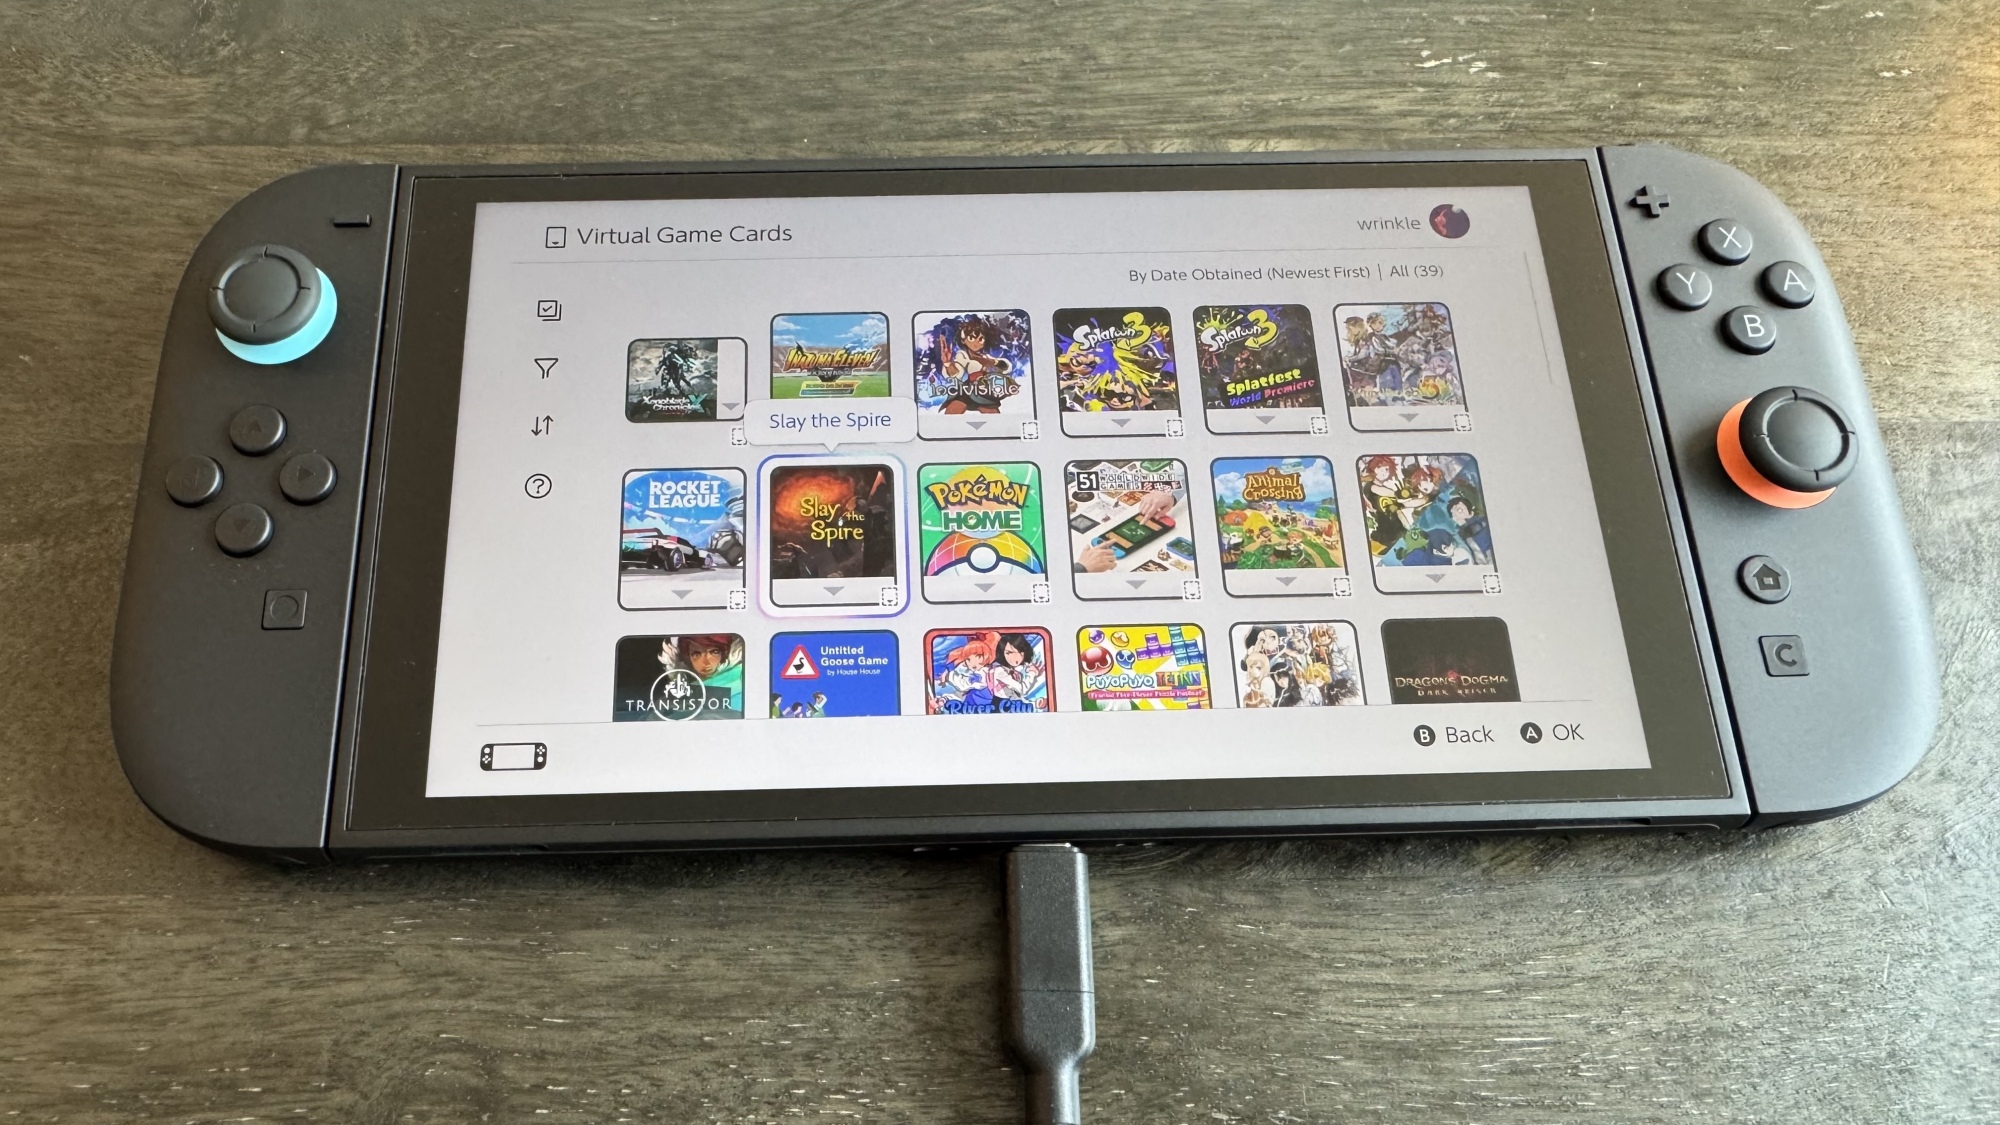
Virtual Game Cards function similarly to physical game cards but are managed online. Consequently, only one console can load a game at any given time, a distinct approach from what’s seen in other digital libraries. To access your Virtual Game Cards, simply tap the Virtual Game Card icon resembling a game cartridge located on your Switch 2 home screen. If logged into your Nintendo account, all your digital purchases will appear here, available for download and play.
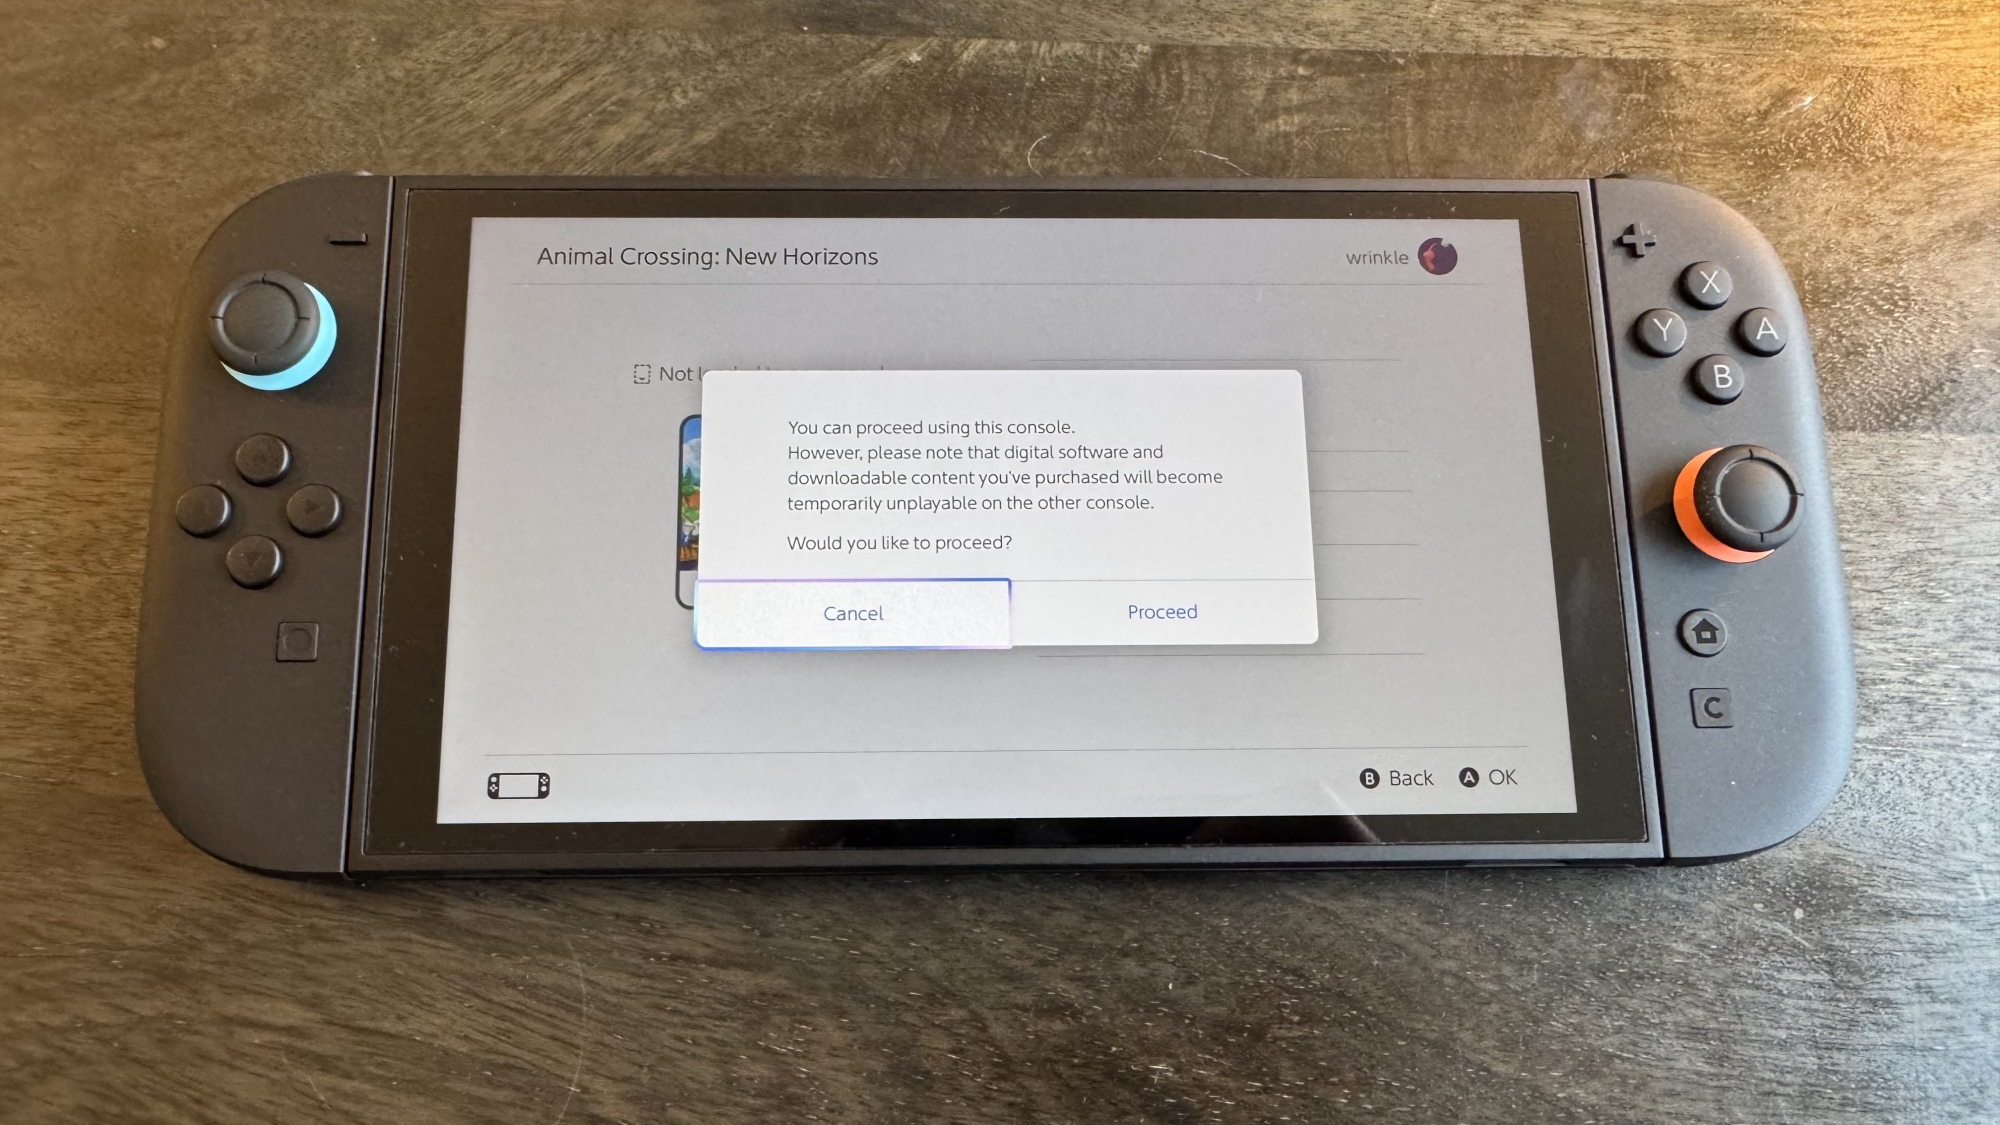
You’ll find a few options here. If a game isn’t present on your original Switch, you can easily download it to the new console by selecting Load to This Console. If the original Switch is not designated as your primary device, you might encounter a warning when attempting to access a game, contingent on the original model’s software updates. If yours lacks the Virtual Game Card update, you can still download the game by clicking on If You Don’t Have That Console. This action temporarily disables the game’s playability on the original Switch while being accessed on the new device.
If needed, the two consoles can be linked by bringing them in proximity and following on-screen prompts to facilitate loading Virtual Game Cards onto the Switch 2. Should this be unmanageable—such as if the original was disposed of while remaining the primary device—you can deregister it from your account and set the new Switch 2 as the primary by logging into the eShop.
If linking devices is successful, you can load Virtual Game Cards from the original system to the new one with ease. Alternate usage of the Load to Another Console function will yield a similar result. Should you wish to keep playing a game on a device after transferring its Virtual Game Card to another, it’s possible to enable Use Online License in System Settings > User Settings > Online License Settings. This requires an internet connection, but it presents a significant workaround, enabling simultaneous play on both devices.
Lending Virtual Game Cards to Others
Another feature to note is the ability to lend Virtual Game Cards to members within a “Family Group.” To initiate this process, establish a Family Group online by visiting Nintendo’s website. Log into your account and navigate to the Family Group tab, where you can invite others or create a group for your child. If you have a Nintendo Switch Online Family Plan, all members benefit from its features across multiple accounts.
Once set up, navigate to the Virtual Game Card page, select the game you want to lend, and click Lend to a Family Group Member. Ensure that both devices are close to one another to complete the process.
You can lend up to three games to different users simultaneously, with each borrower permitted to enjoy the game for 14 days. During this loan period, you won’t be able to access the Game Card, yet the borrower will retain their save data for future use, whether they choose to buy the game or borrow again. Lending can be done repeatedly without limitations, and games can be returned remotely once the borrowing period concludes.
Transferring Save Data
If you chose not to transfer data during the setup, there are still ways to access save files from your original Switch on the new console. Here’s how.
First, utilize the free option. On the original Switch, navigate to System Settings > Data Management > Transfer Your Save Data. Choose Send Data to Another Console, select the user whose saves you wish to transfer, pick the files, and confirm with OK. Note that doing so will erase these saves from your original console after moving them.
For transferring data to the new console, ensure both units are nearby during the process, and on the Switch 2 follow System Settings > Data Management > Transfer Your Save Data and select Receive Save Data.
To shift data in the opposite direction, repeat these steps accordingly from the Switch 2 to the original Switch.
Alternatively, the paid method involves utilizing a Nintendo Switch Online membership for cloud saves. By default, cloud saves are activated, ensuring both consoles remain up-to-date with the latest save data. Manual downloads are possible through a game’s software menu or via System Settings > Data Management > Save Data Cloud. Automatic downloads can also be disabled from this section if preferred.
Locking Your Home Screen with a Passcode
Lastly, enhance your Switch 2 security with a PIN, similar to a mobile device. To set this up, navigate to Settings > System > Console Lock. Follow the on-screen instructions to input your new PIN.
There is much more to explore with the Switch 2, so stay tuned for upcoming insights in the following week. For now, this information should help make your setup journey smoother. Enjoy gaming!