Mastering Notification Control in Windows 11
In today’s digital age, countless devices and applications vie for your focus, making it challenging to maintain productivity. Windows 11 is no exception, often inundating users with alerts, pings, and pop-ups. If left untouched, the default notification settings can become quite overwhelming.
Fortunately, Windows 11 provides robust options for managing notifications. Users have the flexibility to decide which applications and system alerts can disturb them and when these interruptions occur. The availability of various “Do Not Disturb” features enhances this control significantly. Here are the steps to customize notifications on your Windows 11 system to better fit your needs.
Adjusting Notification Preferences
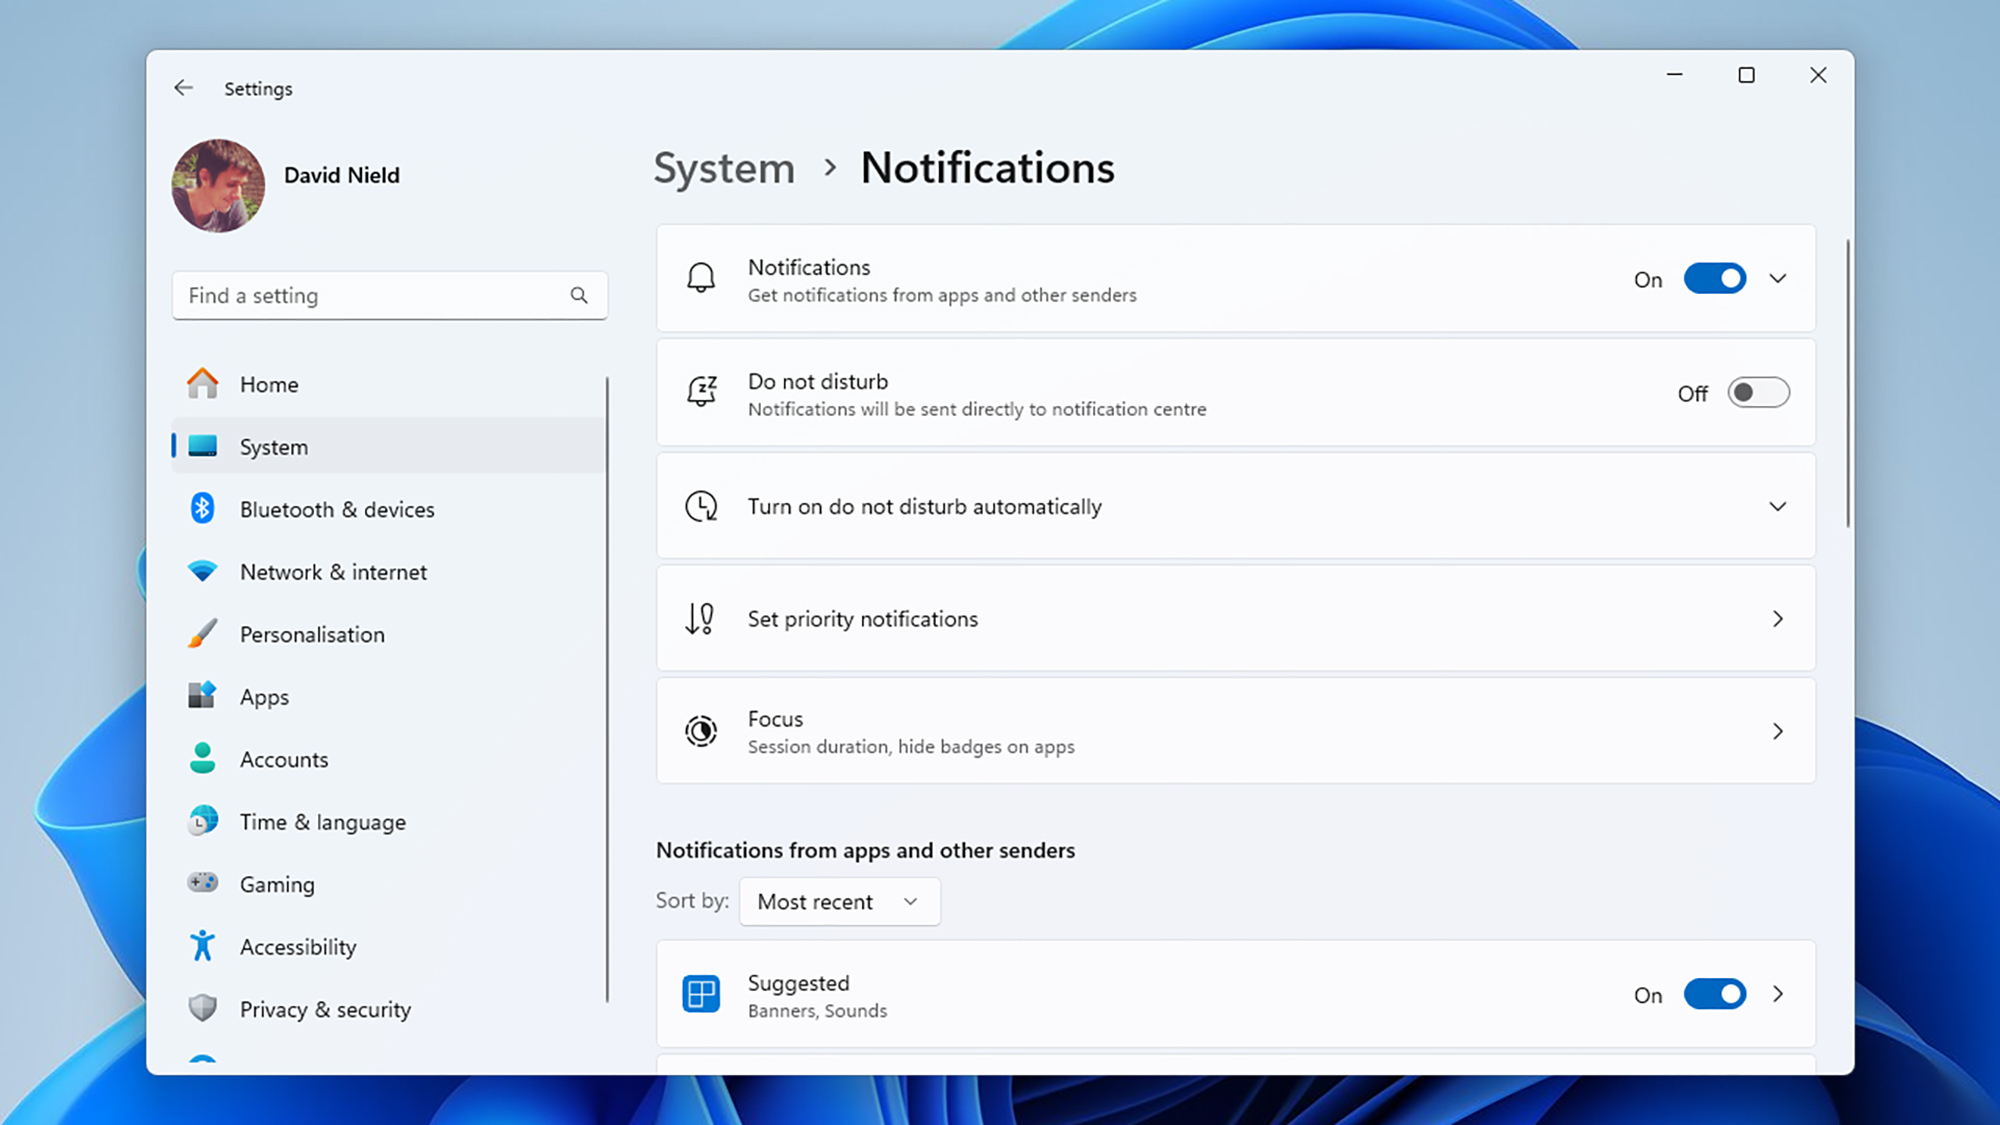
To begin tailoring your notification settings, open the Settings menu from the Start menu and select System followed by Notifications. You will find a toggle switch for Notifications right at the top; flipping this off will silence all notifications entirely. By clicking on Notifications, you can also determine whether alerts should include sounds or be displayed on the lock screen.
Scrolling further down this section reveals a complete list of installed applications on your computer. Here, individual notification preferences can be set for each app. If you prefer to mute a particular application entirely, simply toggle it off. Alternatively, for those wanting a more customized approach, detailed controls are available to manage each app’s notification behavior.
Credit: DailyHackly
Users have the option to allow applications to display notification pop-ups or simply show their alerts in the notification center, which is accessed by clicking on the date and time in the taskbar. Additionally, users can choose to enable or disable sounds for specific notifications and even set the priority level for messages as Top, High, or Normal.
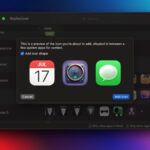
Select the option to Allow app to send important notifications when do not disturb is on which grants the application the ability to alert you during Do Not Disturb periods. The determination of what qualifies as an “important” alert is established by the application developer. For further convenience, notification management is also possible directly from the notification center by selecting the three dots on any alert.
Utilizing Do Not Disturb and Focus Modes
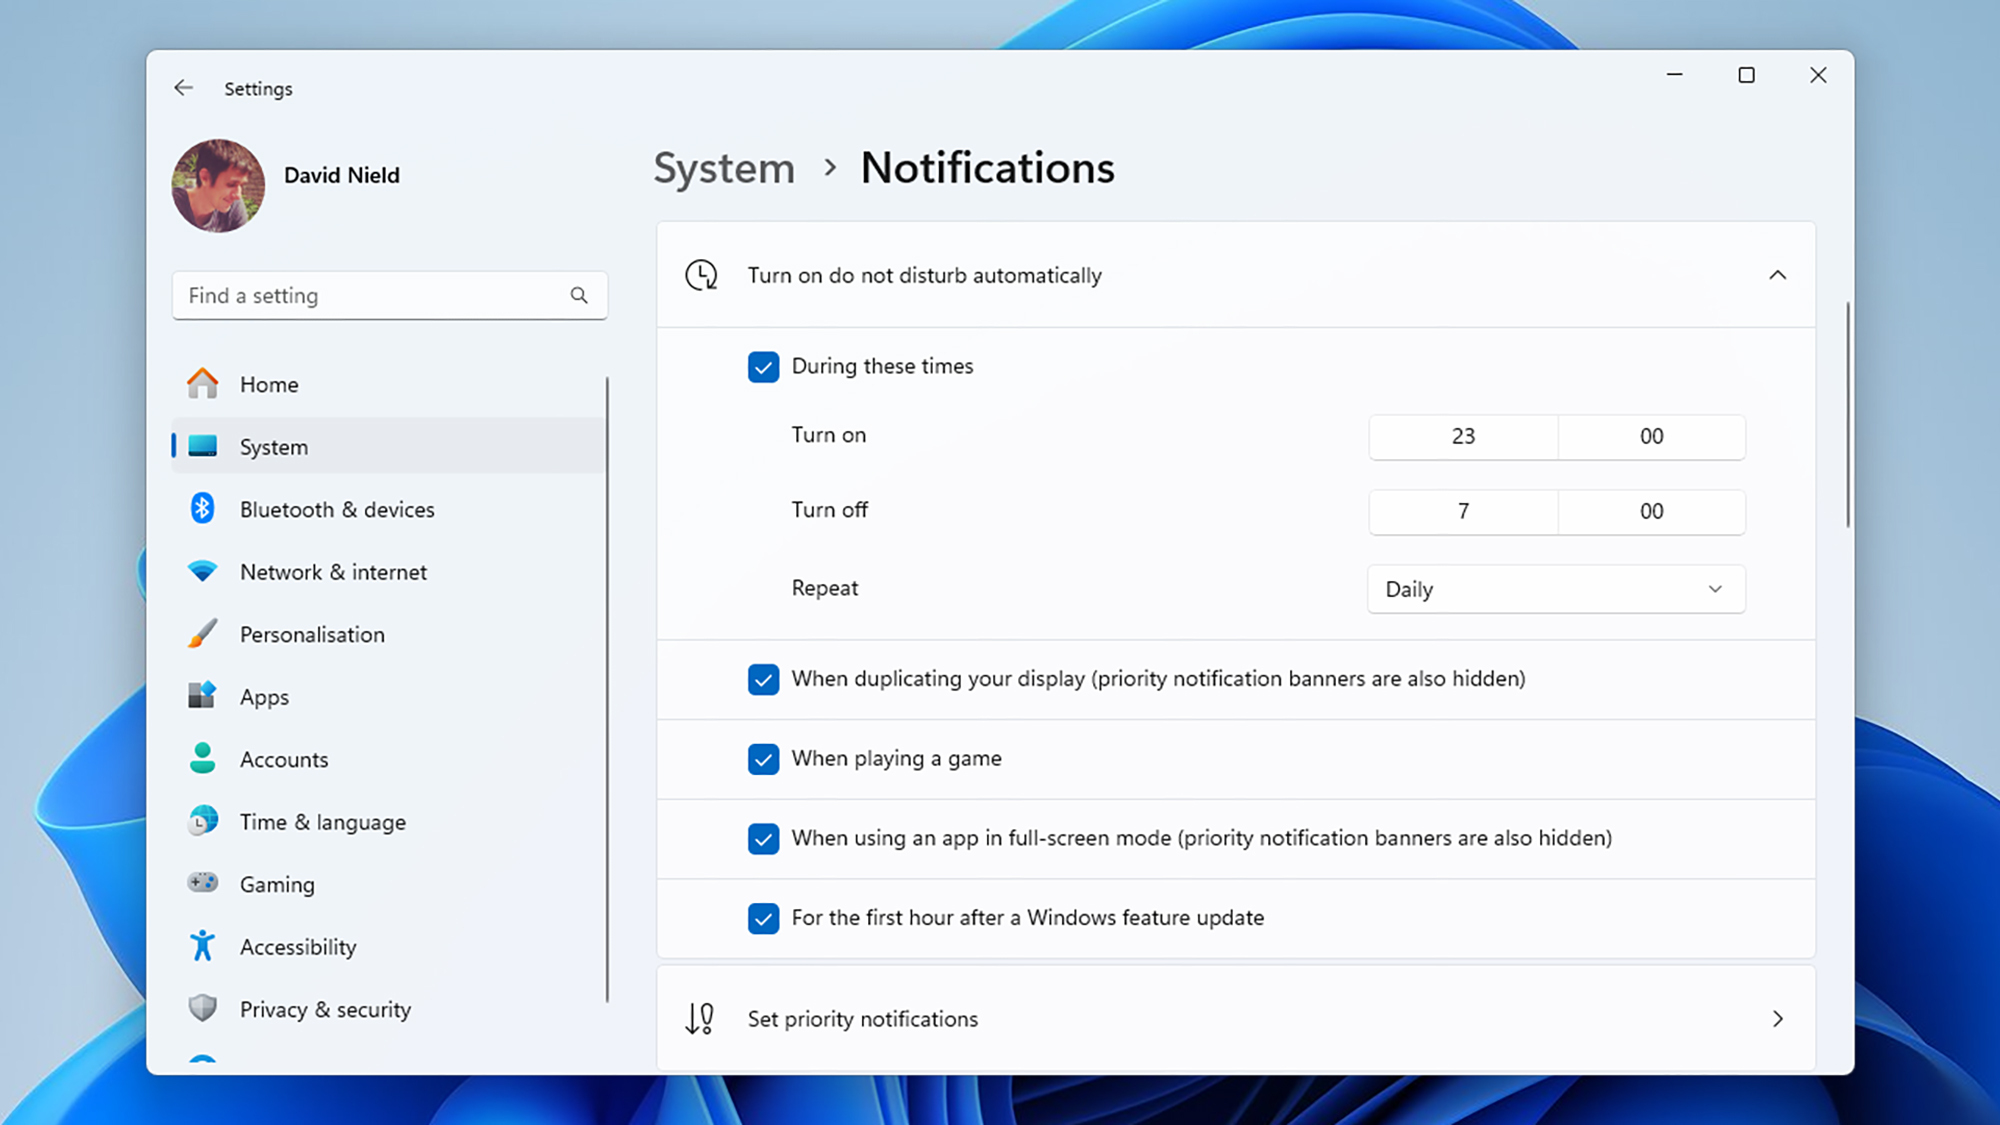
The well-known Do Not Disturb option, which temporarily suspends notifications, can easily be activated in Windows 11. Within the Notifications panel, users can toggle Do Not Disturb on or off manually, or opt for the feature to be scheduled automatically, including an automatic activation during gaming sessions.
By selecting Select priority notifications, users gain the ability to customize which applications can override the Do Not Disturb settings. Default settings keep reminders and alarms active, as they are typically essential; however, these can be turned off if desired. This setting also allows the addition of any application here, ensuring all its notifications bypass Do Not Disturb restrictions.
Credit: DailyHackly
Returning to the Notifications screen, users can access the Focus feature, which serves as an enhanced version of Do Not Disturb. This allows for tailored periods of distraction-free computing, implementing all the restrictions that Do Not Disturb offers, while also preventing taskbar applications from displaying visual notifications or indicators. Users can even display a timer if they choose.
To initiate a Focus session, set your desired duration and click Start focus session. This option is also available via the notification center for easier access. Simply click on the time and date in the lower right corner, set your session duration, and click Focus. The Clock app will launch to manage the Focus feature, and the session will commence.
Customizing Settings for Individual Applications
Just like mobile operating systems, individual applications on Windows come equipped with their own notification settings, which can be adjusted alongside the general system settings for a more personalized experience. For optimal control over notifications, exploring individual app settings, as well as website-specific alert settings, is advisable.
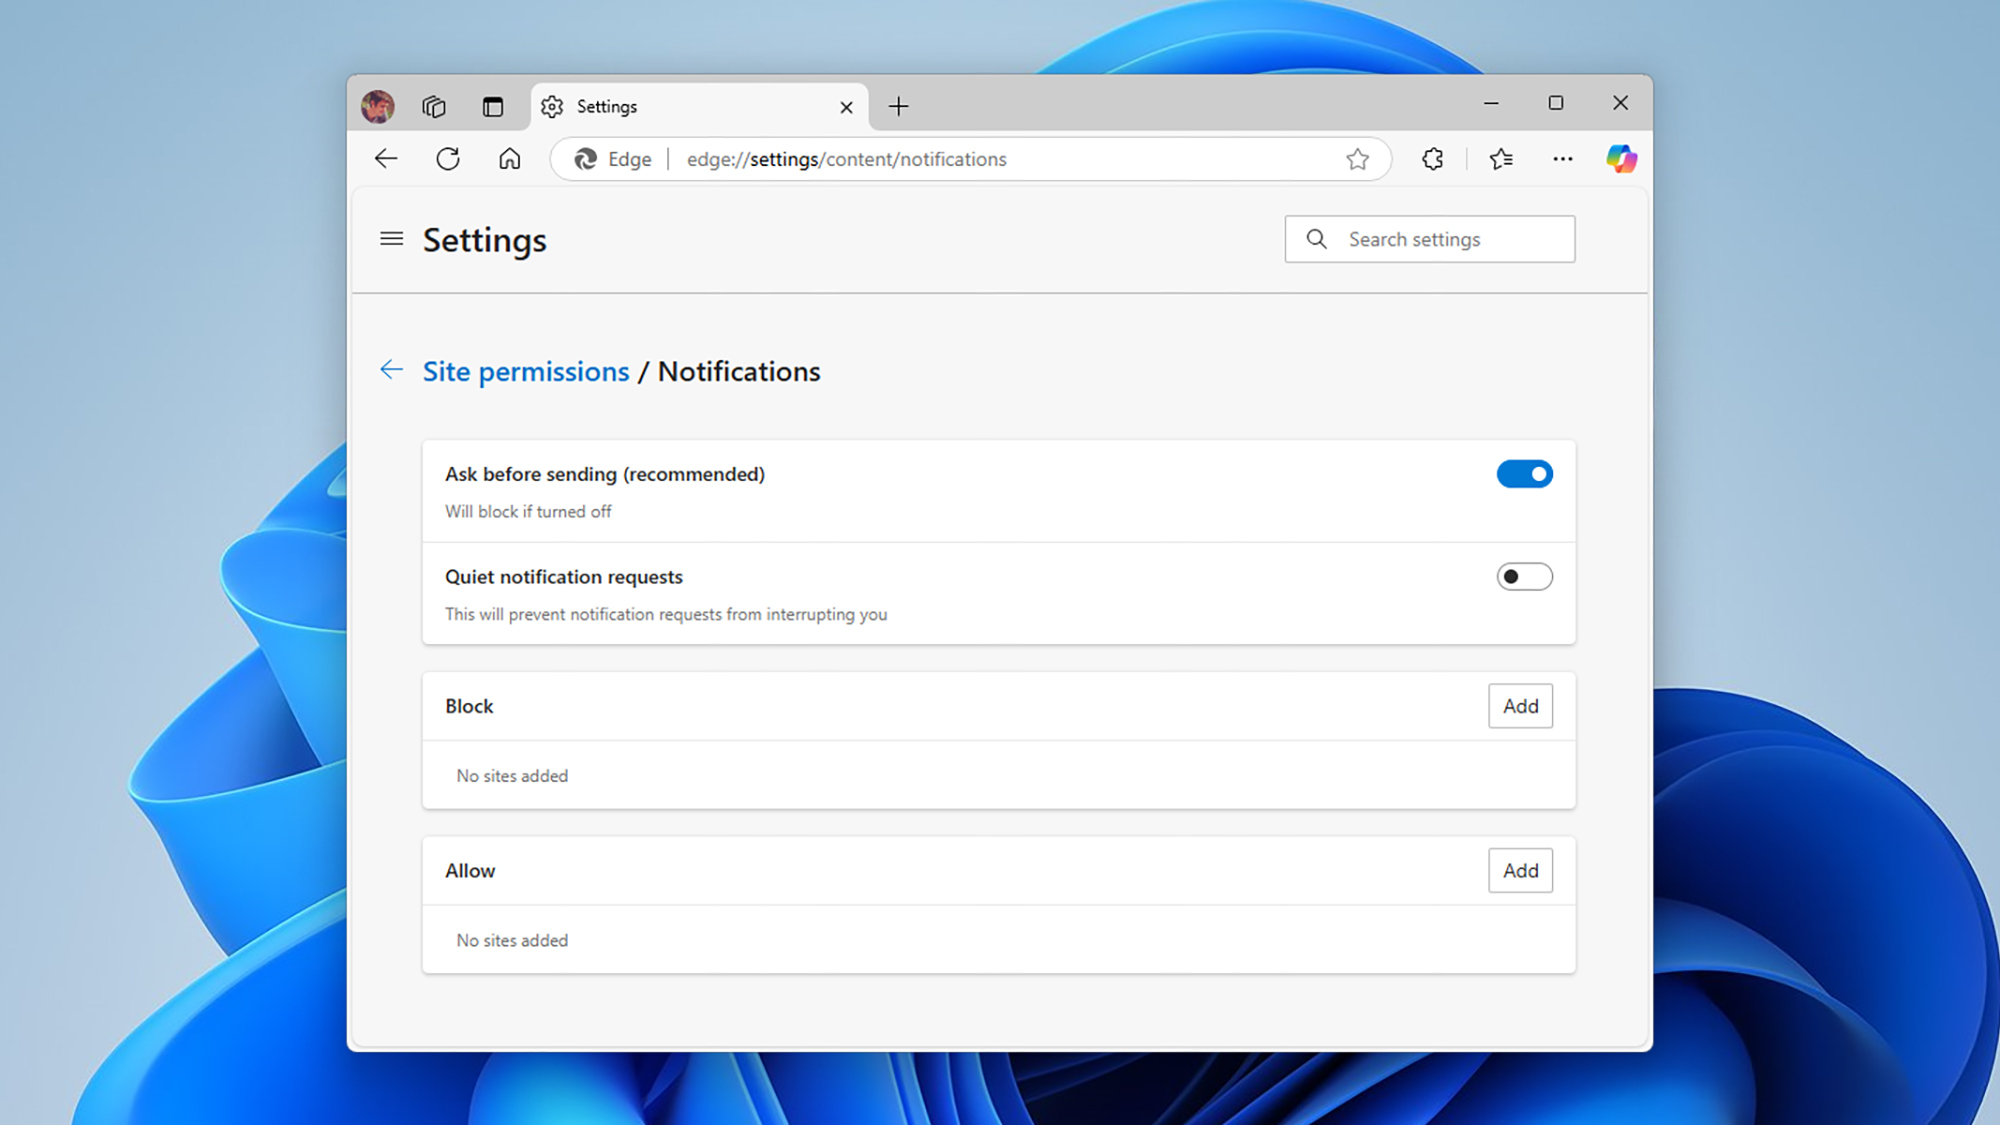
Consider Microsoft Edge as a case in point: Clicking the three dots in the top right corner, selecting Settings, then navigating to Cookies and site permissions followed by Notifications will allow you to specify which websites can send you notifications. By default, websites must seek permission before delivering alerts, but this can be toggled off to eliminate even the request prompts.
Credit: DailyHackly
Moreover, delving deeper reveals that numerous websites have specific notification settings themselves. While an exhaustive exploration of every site is beyond the scope of this article, consider Slack as an example—select your workspace name at the top left corner and navigate to Preferences followed by Notifications to establish periods during which Slack will refrain from sending alerts, independent of Edge and Windows settings.
The Microsoft Store also offers its own notification settings. By clicking on your Microsoft account avatar at the top, users can access Settings. There, disabling the Notifications for app installations toggle will prevent notifications related to program updates through the store.