Breaking Up with Facebook: A Comprehensive Guide
There was a time when Facebook represented the cutting-edge of social media, allowing individuals to connect with friends and family, rekindle old friendships, and share countless images from parties and vacations. Compared to MySpace, its interface felt cleaner and more user-friendly, making it a popular choice among users.
Fast forward to today, and Facebook’s reputation has drastically shifted. It now feels overwhelmingly cluttered with artificial intelligence content, relentless advertisements, and sensationalized headlines. Furthermore, the platform has chosen to reduce its fact-checking efforts, prompting many users to explore alternatives where social media interactions are more private and restricted, such as group chats on WhatsApp.
If the moment has arrived for you to part ways with Facebook, it’s essential to know the steps to take before finalizing your departure. Notably, opting for account deactivation allows continued use of Facebook Messenger for communications, a detail explained further in this guide.
The following instructions are tailored for Facebook’s desktop version, but similar navigation can be found within the mobile applications.
Tasks to Complete Before Deleting Facebook
Credit: DailyHackly
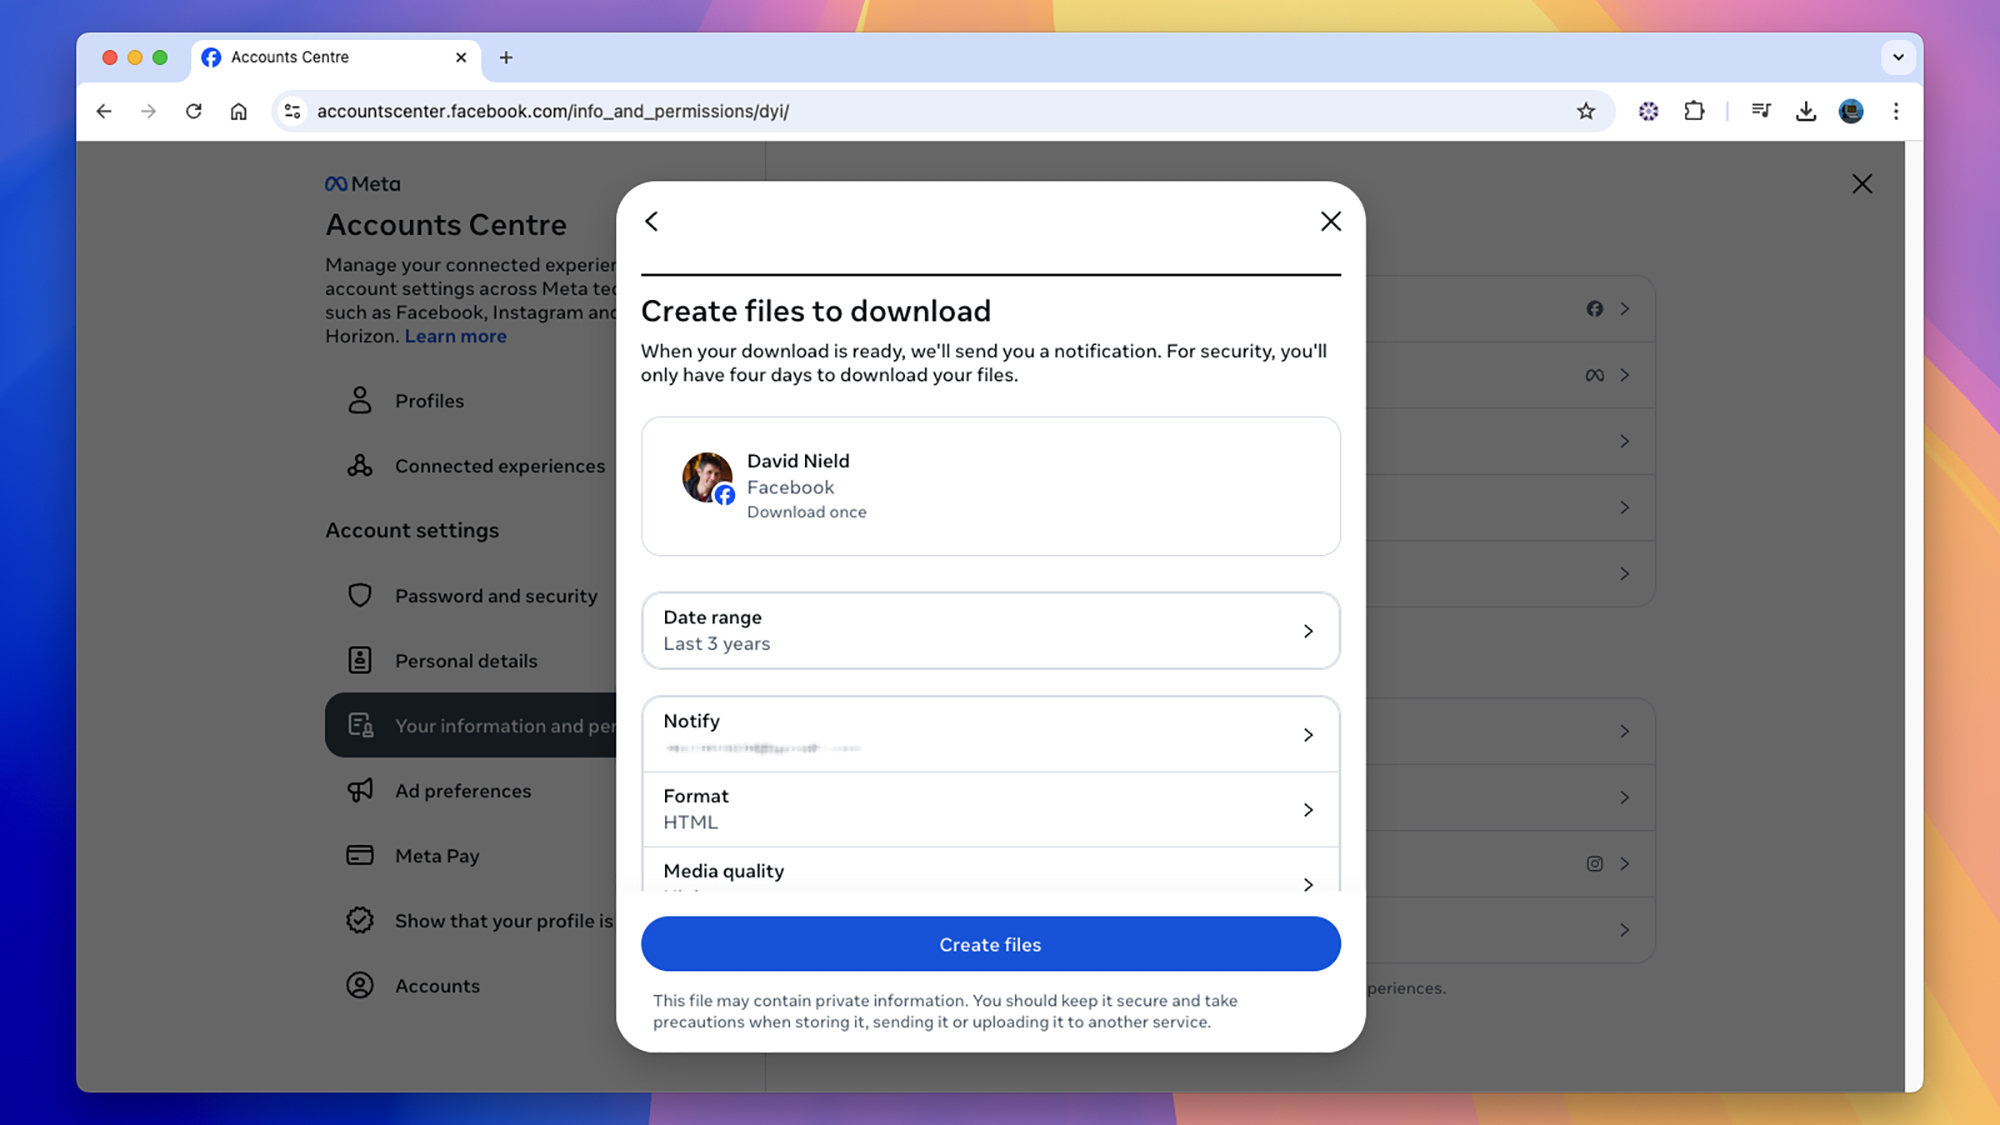
Before permanently closing your Facebook account, it’s advisable to undertake some preparatory tasks. This includes extracting any content you wish to retain and severing connections with third-party applications to mitigate potential errors or security vulnerabilities in the future.
To download your information, log into Facebook on a web browser, click your profile picture in the upper-right corner, followed by Settings & privacy. Next, select Settings, then navigate to Download your information and click Continue. The platform will guide you through the process of selecting the specific data you wish to download and prepare an archive for you.
Your downloadable data can include messages, posts, photos, videos, friend lists, and profile details. There’s also an option to choose a date range; select All time if you wish to capture everything. The time required to process your request will vary based on the selected information, but you will receive a notification via your registered email once the download is complete.
Next, evaluate the apps and services linked to your Facebook account. From your profile, access the same dropdown menu, select Settings & privacy > Settings > Apps and websites. Review the connections you have allowed over the years, including browser add-ons and games—press Remove alongside each entry to disconnect them.
Finally, examine the locations where you are currently logged into Facebook. Click your profile picture, follow Settings & privacy > Activity log. On this page, check both Where you’re logged in and Recognized devices. Click the three dots next to each entry to Log out or Remove, ensuring that no remnants of your Facebook activity remain accessible from other devices.
Steps to Permanently Remove Facebook
Credit: DailyHackly
<pWith your preparations concluded, it's finally time to erase your Facebook profile for good. Start the deletion process by clicking on your profile picture (upper right), then select Settings & privacy > Settings > Accounts Center. This section displays all accounts associated with Meta—Instagram, Horizon, and Facebook can be managed and deleted independently.
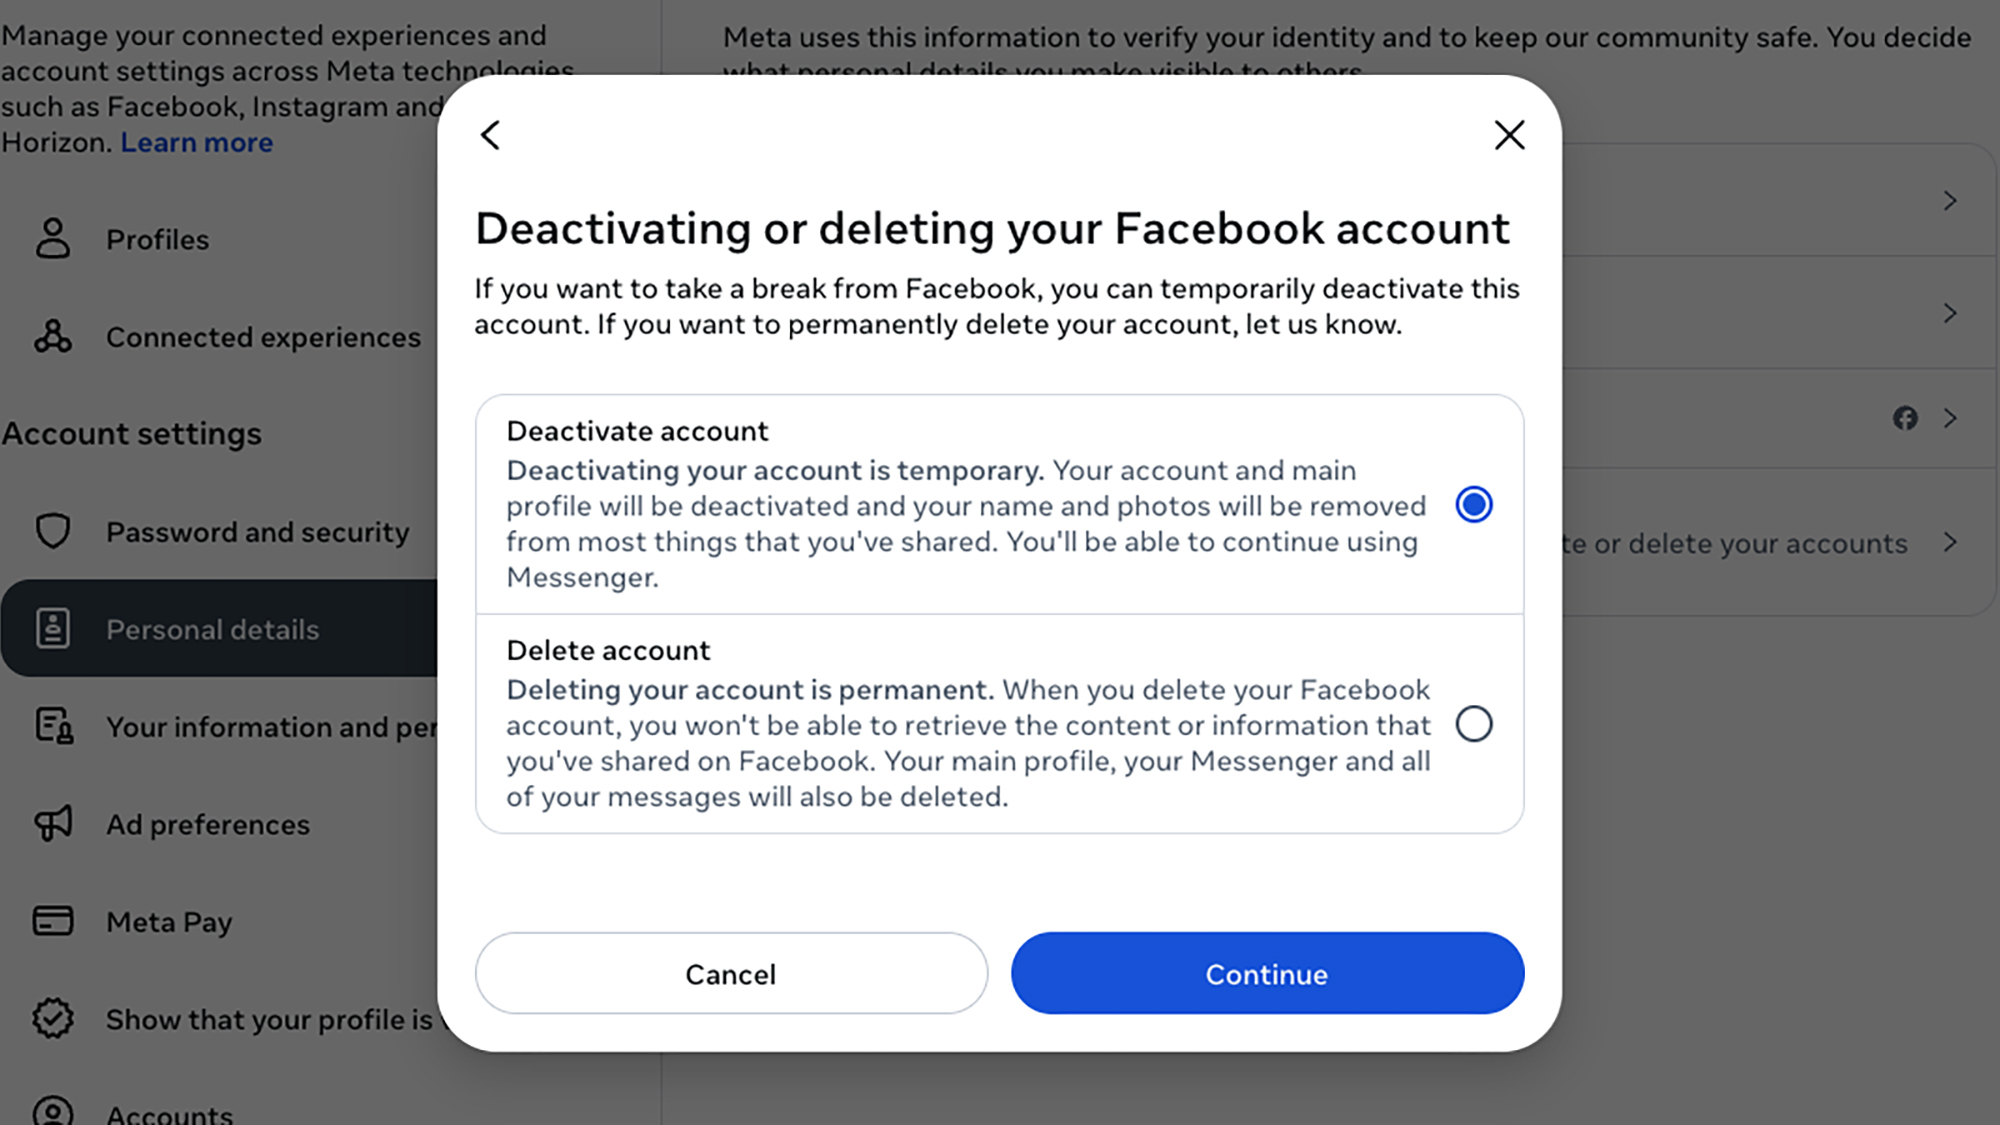
Select Personal details, then Account ownership and control, followed by Deactivation or deletion. From there, choose the Facebook account you wish to delete. The following screen will present options: Delete account (which removes all associated data) or Deactivate account (a temporary solution that allows you to return later).
If uncertainty lingers about leaving Facebook, consider choosing deactivation. This will hide your profile but still allow others to contact you via Facebook Messenger. None of your posts, images, or videos will vanish, ensuring they remain available should you decide to come back without any deadline for reactivation.
However, if you’re ready to fully disconnect from Facebook, click on Delete account and then Continue. You’ll be prompted to provide a reason for your exit, given the choice to deactivate instead, and will also be reminded to download your data (should you have missed this step previously). Ultimately, you will reach a confirmation screen that initiates the account deletion process and logs you out of Facebook.
Keep in mind that you have a 30-day window in which to reconsider your decision. Logging back into Facebook during this time allows you the option to restore your account, regardless of the choice to permanently delete it. The platform notes that the complete removal of your activity from its records can take up to 90 days.