The Portable Gaming Revolution: Installing SteamOS on Your Handheld
The introduction of the Steam Deck has significantly altered the landscape for PC gamers, providing a level of portability that had typically been the realm of Nintendo enthusiasts. This shift has prompted other manufacturers to develop Windows-based handheld devices, though the outcomes have been varied. Recently, Valve has made available official guidelines for installing SteamOS on devices beyond the Steam Deck. Let’s explore the steps involved and weigh the decision of whether to proceed with this installation.
It’s essential to highlight that the landscape for official support from device manufacturers can be murky. As of now, the Lenovo Legion Go S stands out as the sole handheld device featuring the “Powered by SteamOS” label (alongside the Steam Deck), which guarantees full support with a final version. Though you can install SteamOS on devices like the Legion Go and ASUS ROG Ally, these installations are not yet finalized.
Also, it’s important to emphasize: removing Windows from your device means you will lose access to Windows-only games that don’t function through SteamOS. This primarily encompasses online games requiring anti-cheat protocols. Thus, for a clearer picture of supported titles, checking resources like ProtonDB is advisable.
Benefits of Installing SteamOS on Your Windows Handheld
With potential drawbacks acknowledged, what advantages does this offer? To put it simply, Windows is not inherently crafted for handheld devices. At its core, Windows tends to regard your gaming handheld as a laptop. This includes background applications like Microsoft Teams that can disrupt gameplay with notifications about your battery status.
The experimentation with SteamOS alongside Windows has revealed that Windows can significantly hinder both frame rates and battery performance. Even gaming laptops, which excel at routine tasks, often struggle to provide extended playtime without constant charging. Consequently, optimizing settings for maximum battery efficiency is crucial.
This issue becomes amplified in handheld devices due to their compact battery sizes. Experiences have shown that even light titles such as Stardew Valley can yield less than two hours of play on a Windows handheld, while alternatives like the Steam Deck and even the Nintendo Switch can last six hours or more.
Furthermore, since Windows is primarily a desktop system (and secondarily a tablet), adjusting settings with controller inputs becomes cumbersome. What is the controller equivalent for a Ctrl+Alt+Delete command? Plugging in a keyboard may assist in navigating settings, but SteamOS offers a more user-friendly interface specifically designed for controllers.
Moreover, Valve’s implementation of the Proton compatibility layer for Steam games has proven to function so effectively that it’s nearly seamless. Initially, skepticism surrounded the capability of Steam Deck to perform on par with native Windows games, but extensive playtime in titles like Hades II has demonstrated that many games can operate even more efficiently on SteamOS compared to Windows.
Step 1: Create a SteamOS Recovery Image USB Drive
Now, let’s begin the installation process. To set up SteamOS on your handheld, you will need two items: the SteamOS recovery image and a USB drive (a USB-C stick with a minimum of 8GB is recommended). Ensure that any existing data on the USB drive is backed up, as this process will format the drive.
The Steam Deck recovery image can be downloaded here. The file is slightly over 3GB, so the download might take some time depending on your internet speed. While the download is in progress, you’ll need a tool to create the recovery USB. Valve suggests using Rufus for Windows, and for Mac or Linux users, Balena Etcher.
Once the recovery image downloads, utilize the chosen tool to write the image to the USB drive. This process should be quite straightforward. For instance, with Rufus, you will see a dropdown menu where you can select the drive to write the file to, and under Boot Selection, select the recovery image file. Click Start and wait patiently. Reminder: This will erase all data on the USB drive.
Step 2: Disable Secure Boot
This phase might present some challenges as the exact procedure will depend on the specific handheld you possess. Valve provides detailed guidance here for several models, including the Legion Go and ROG Ally. Other devices from manufacturers like MSI or Ayaneo will have distinct methods.
In general, the following steps usually apply:
- Access BIOS: Similar to traditional computers, there’s a method to access BIOS on your handheld, usually by holding a button like Volume + while powering on. If this doesn’t work, consult your device’s manual for specific instructions.
- Locate Secure Boot Settings: You may need to navigate through various sections within the BIOS menu, potentially entering an Advanced settings mode to locate this setting. Look for “Secure Boot” and set it to Disabled.
- Save Changes and Restart: After adjusting the Secure Boot option, ensure you save the BIOS changes before rebooting your device.
Depending on your device, you may need to use the touchscreen to navigate BIOS or connect a keyboard or mouse. As noted earlier, Valve offers specific instructions for some devices, but manufacturer support is the best resource for unique devices.
Step 3: Boot from the SteamOS Recovery Image
With Secure Boot disabled, connect the USB stick to your handheld and restart it. This should direct you to a boot menu where you can choose the drive to initiate from. The process may vary across devices, so if you’re uncertain how to access the boot menu, please refer to your device’s manual.
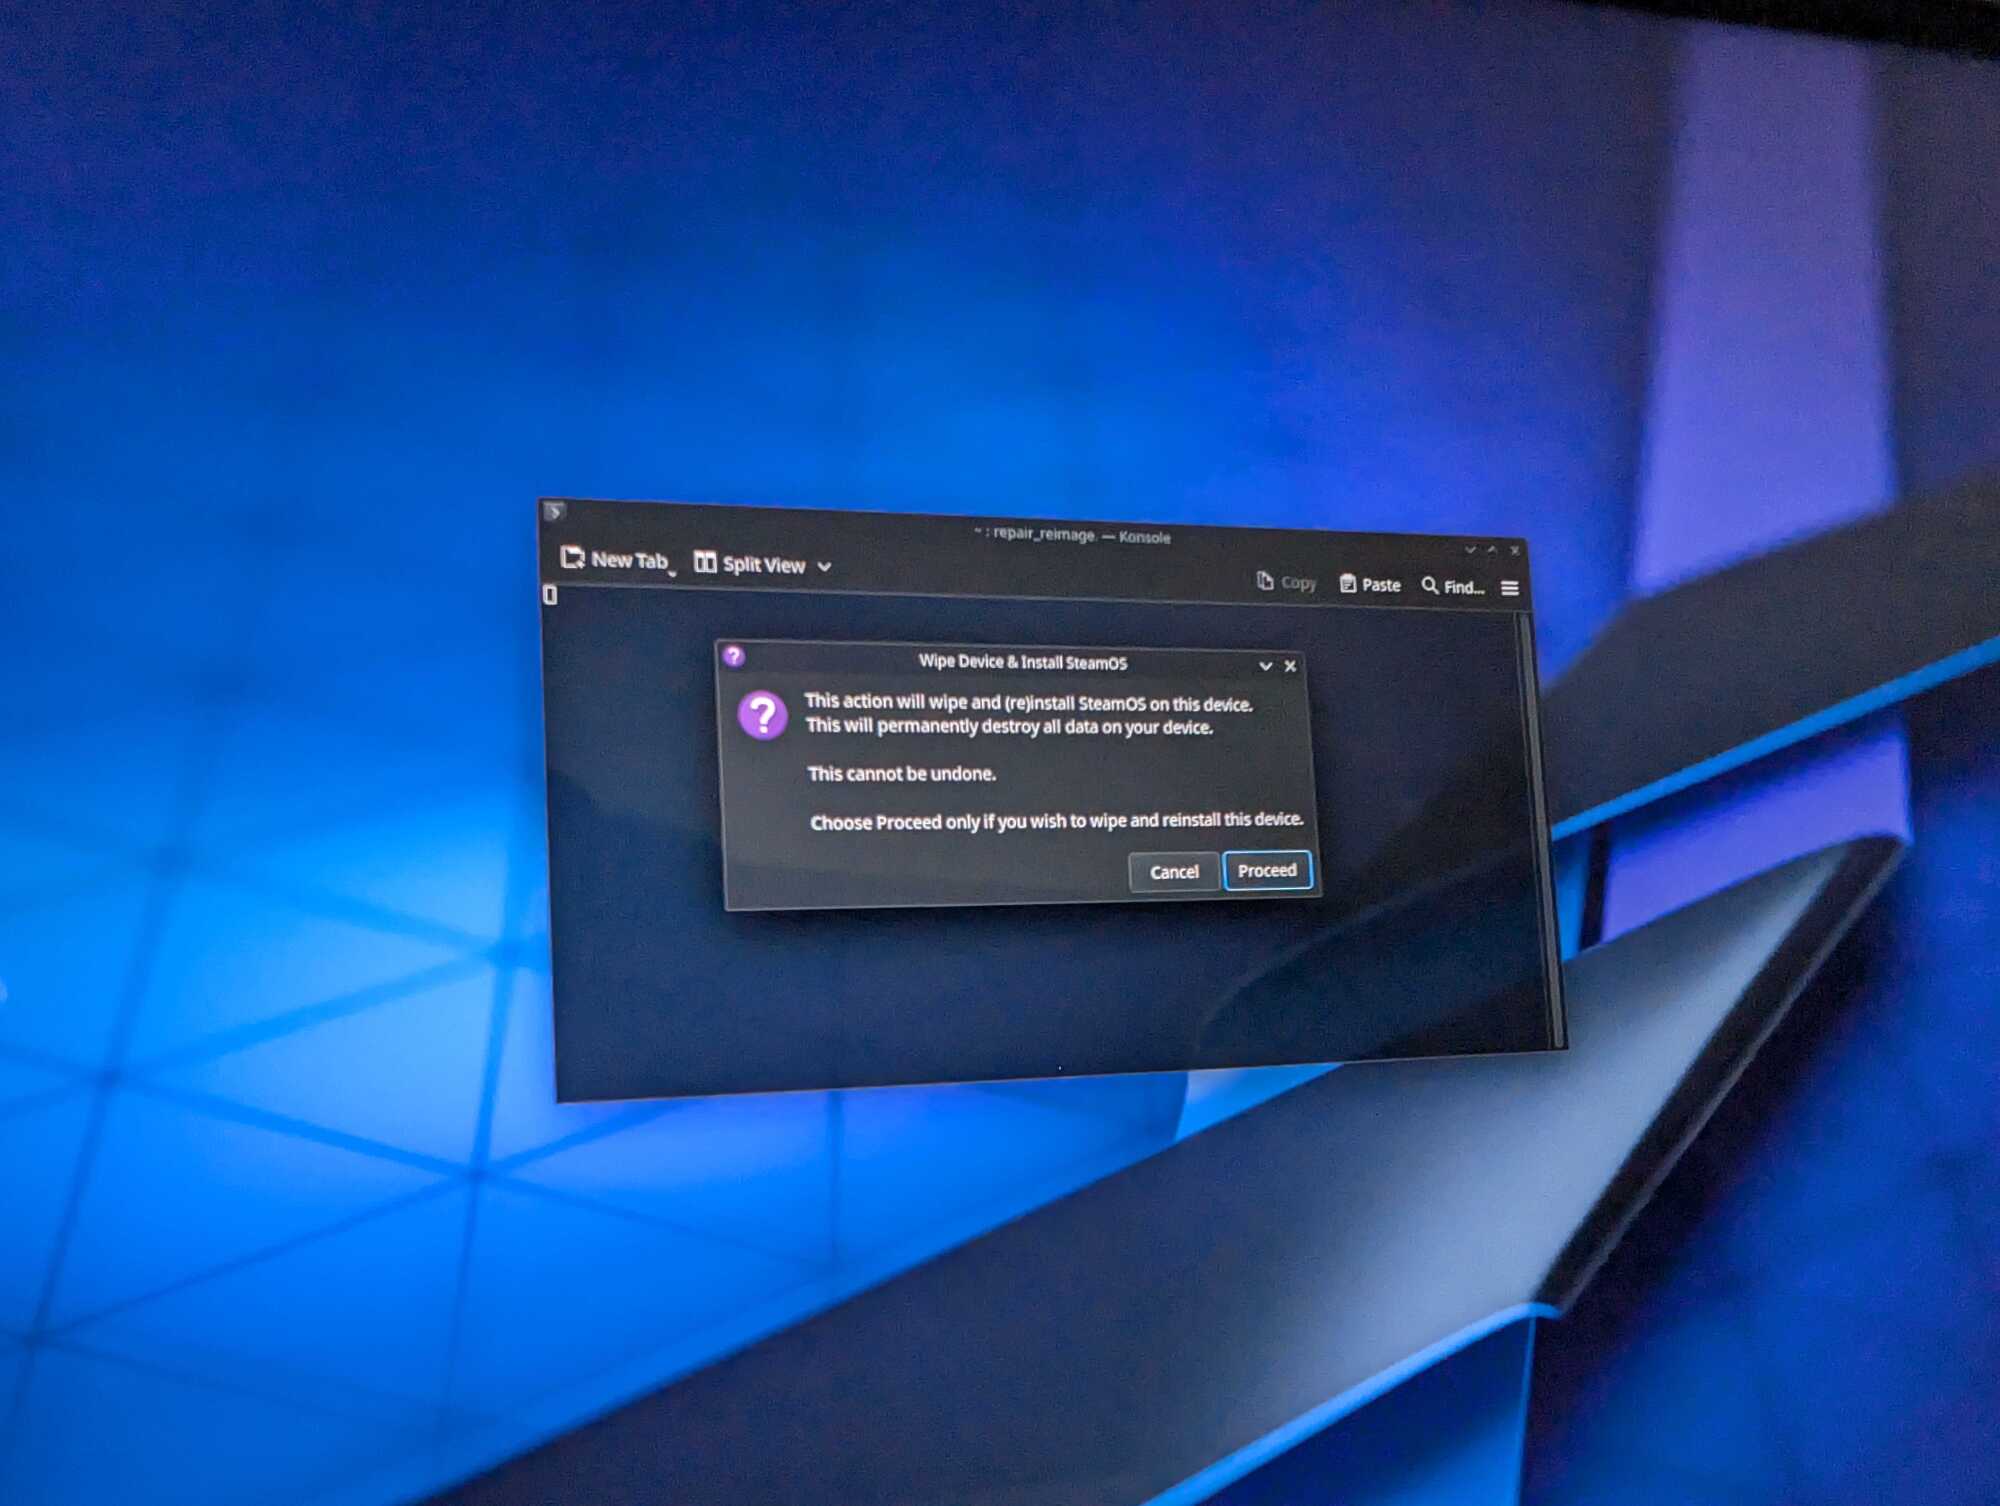
Select the USB drive with the SteamOS recovery image from the boot menu. This action will direct you to the SteamOS desktop environment, where you will find four options on the desktop. The option to focus on is labeled “Wipe Device & Install SteamOS”. Click it once (if clicked twice, it will launch twice).
You will receive a warning indicating that proceeding will erase all data on your device. If you have any crucial game saves, media files, or important documents that have not been backed up, you still have the opportunity to revert the process at this stage. However, this is a decisive moment; ensure you’re prepared before moving forward.
Step 4: Get Acquainted with Your Device’s New Features
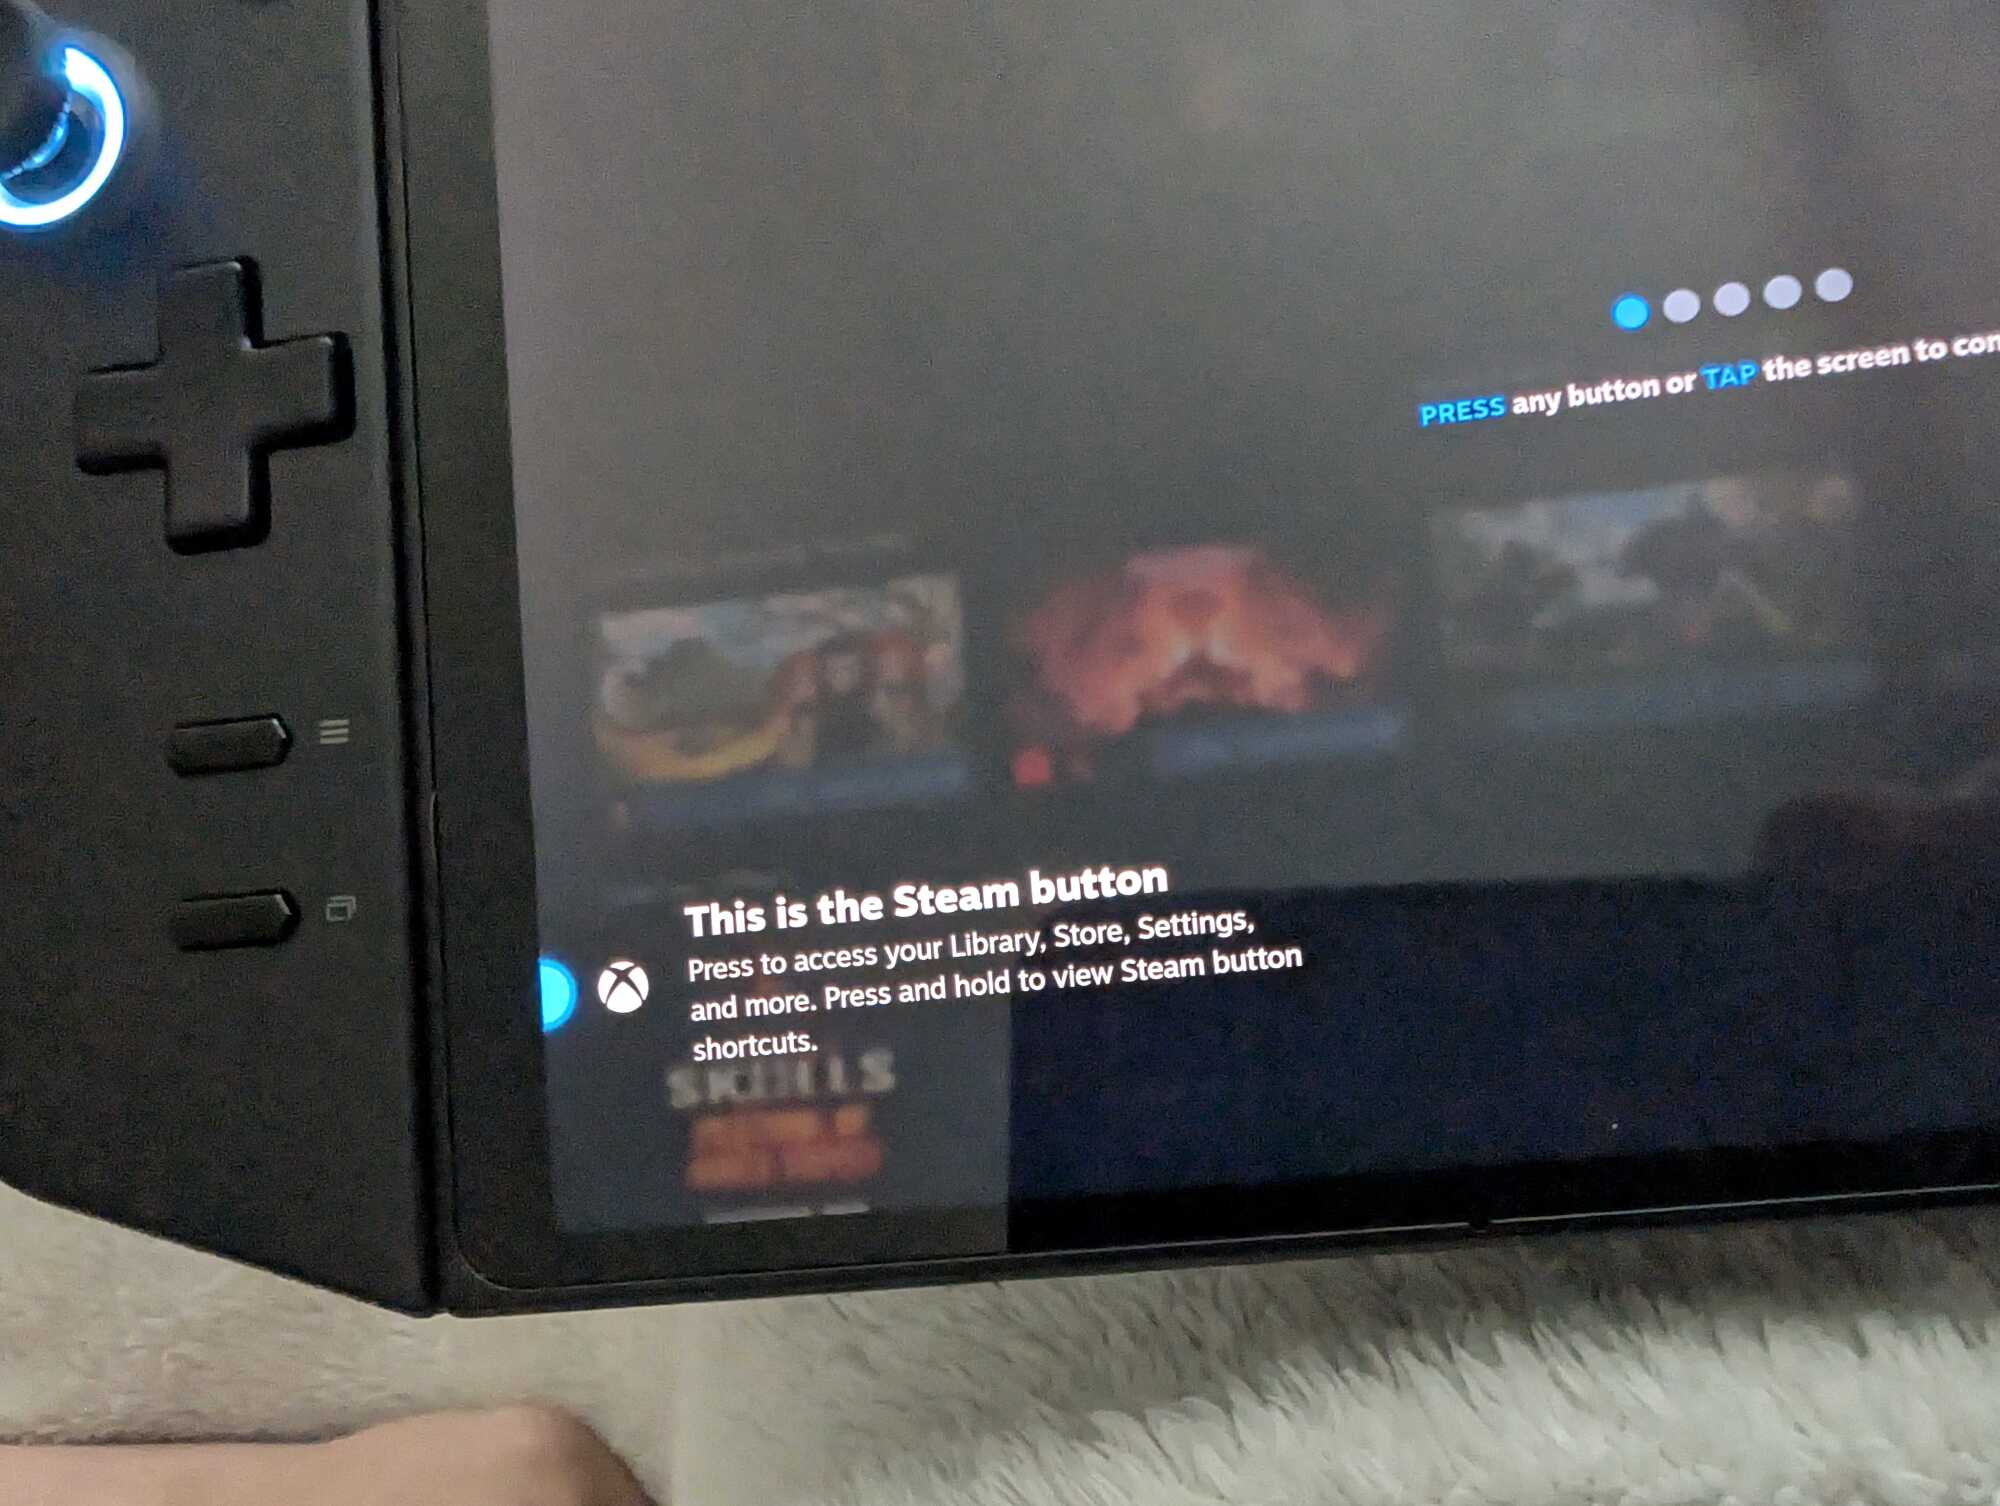
The installation duration is relatively short—your device will restart and enter the setup phase as though it were a Steam Deck. However, expect some initial discrepancies. For instance, during trials on the Legion Go, the tutorial mistakenly indicated the “Steam button” using the Xbox logo when the actual button was located on the top-right side and bore the Legion logo. Certain features, like the microSD card slot mentioned in the tutorial, may not exist in your device.
If your handheld isn’t an officially “Powered by SteamOS” device, anticipate some inconsistencies while operating it. For example, certain games may not install correctly—attempting to install Doom Eternal resulted in no response at all—requiring time to decipher which buttons correspond to Steam Deck inputs.
Nonetheless, surprisingly, many functionalities that were presumed to be problematic worked perfectly. The Legion Go’s detachable controllers performed admirably during gameplay, with no latency issues observed in demanding titles like Hades II.
Your experiences will vary according to the games and hardware you choose for SteamOS. As anticipation builds for more manufacturers to officially embrace SteamOS—or for Microsoft to release a true handheld version—there remains excitement in finally having options in the platform landscape for these devices.