How to Effectively Manage Your iPhone App Subscriptions
Many individuals find their smartphones brimming with applications. This includes those that are genuinely wanted, some that are tested for professional purposes, and others whose presence remains a complete enigma. The challenge escalates when subscriptions for these apps begin to siphon funds from bank accounts—either monthly, quarterly, or annually—often without the owner’s awareness. The reality of “free trials” frequently translates into financial loss, as users may forget to verify the subscription status of those apps.
Previously, tracking these subscriptions seemed daunting. Scrutinizing bank statements to pinpoint recurring charges labeled as “Apple.com,” hypothesizing about the app associated with each charge, and through an arduous process, navigating to the respective apps to terminate the subscriptions felt overwhelming. Fortunately, iPhones simplify this process significantly. There are two key locations where all subscriptions are neatly compiled: within the Settings menu and the App Store.
Accessing and Managing Subscriptions via the App Store
To begin, launch the App Store on your device. Locate your Apple ID avatar positioned at the top right corner. By tapping on it, a menu appears featuring options like Apps, Subscriptions, Purchase History, and Notifications. Selecting Subscriptions directs you to a comprehensive list showcasing all your active subscriptions—complete with the app name, icon, its cost, and the date of the next automatic renewal.
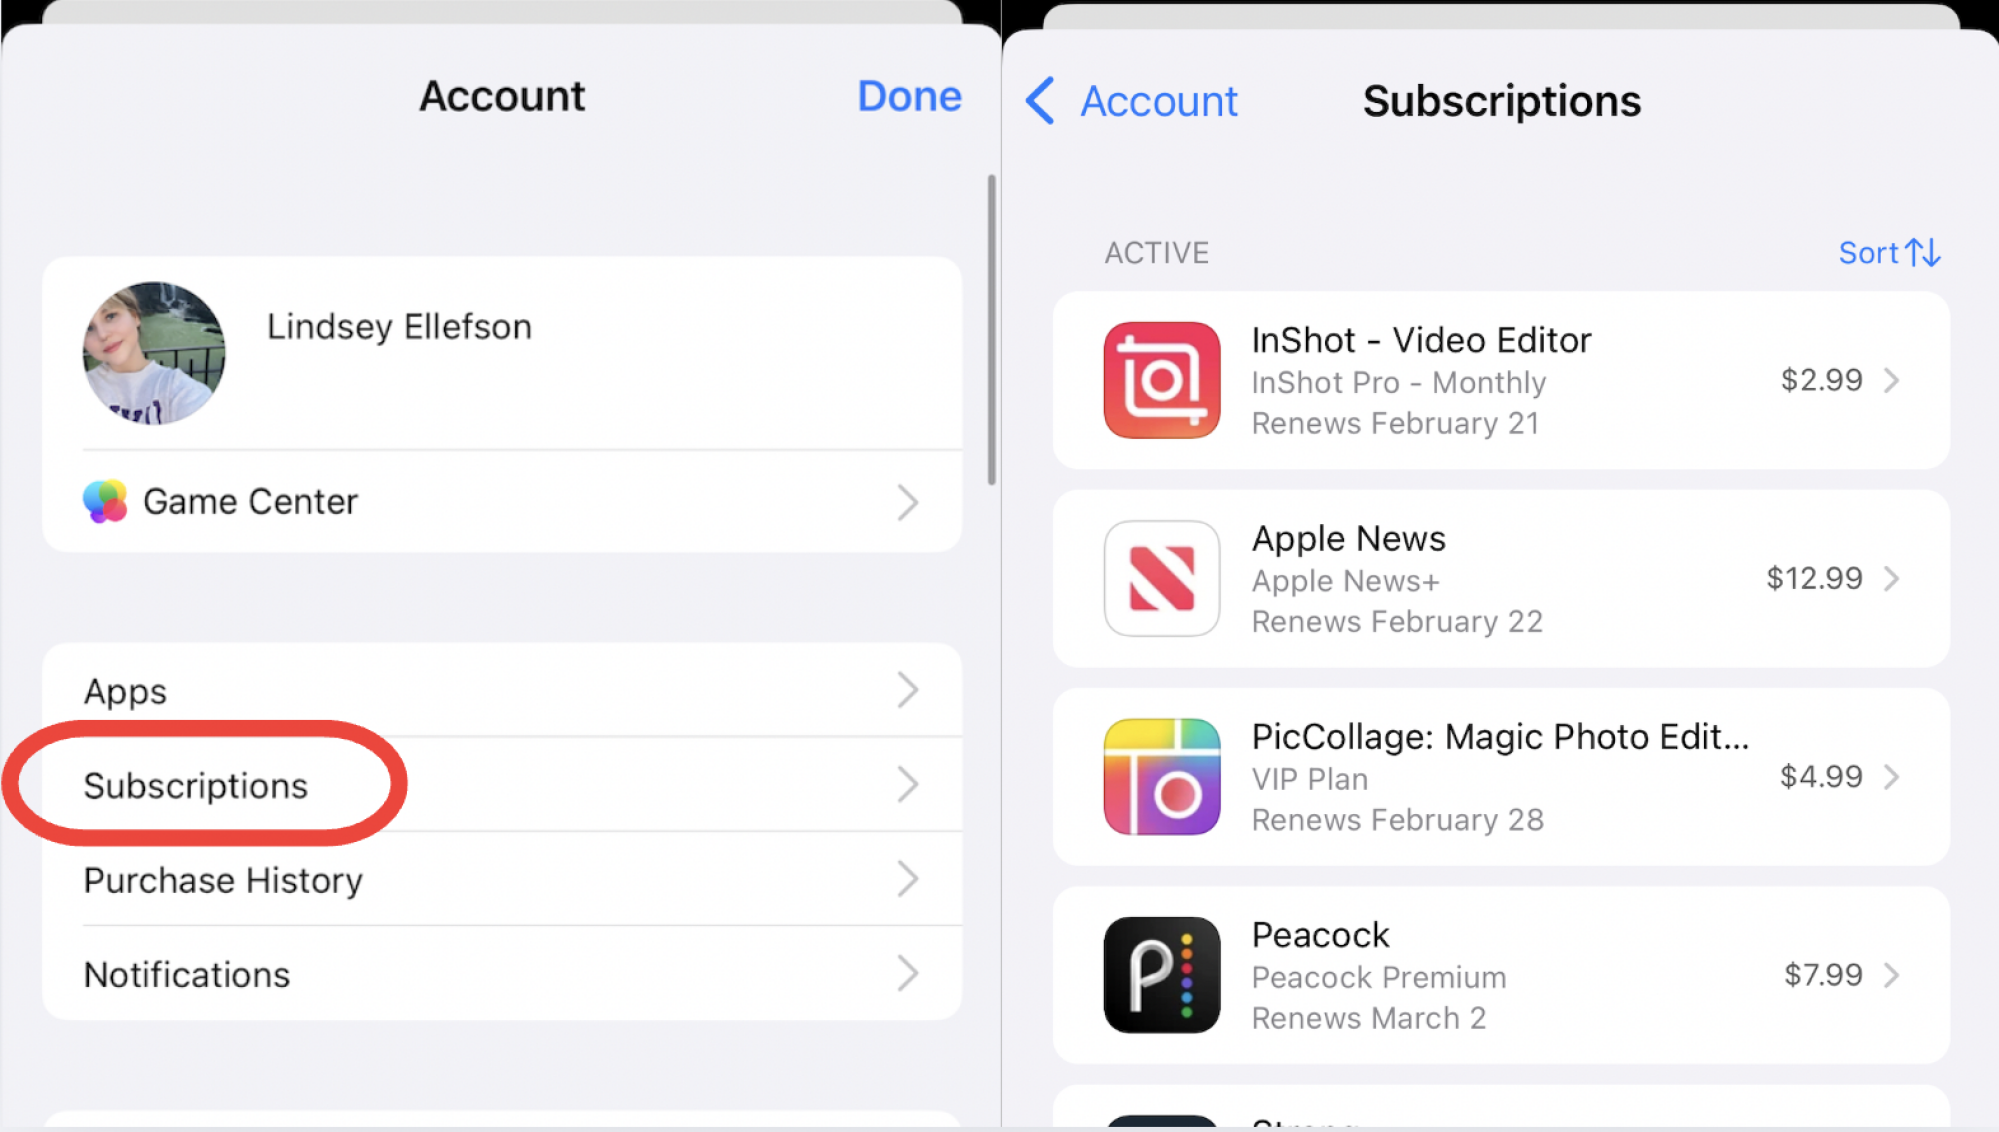
In the upper right corner, sort the subscriptions by name, cost, or renewal date for easier navigation. Tapping on a subscription leads to detailed information about it, where you also have the option to cancel. Upon cancellation, the page updates to indicate how many days remain before the subscription expires. Additionally, scrolling down reveals former subscriptions that are inactive, enabling easy re-subscription without diving back into the individual apps or merely reviewing past expenditures.
Accessing and Managing Subscriptions via Settings
To find an alternative route, open the Settings app and tap on your Apple ID, which is listed at the top. This provides a menu with options such as Personal Information, Sign-In & Security, Payment & Shipping, and Subscriptions. Choosing this last option takes you to the same interface available via the App Store, showing both active and inactive subscriptions. Whether accessed from the App Store or Settings, this information remains consistent.
Essential Considerations for Managing iPhone App Subscriptions
It is essential to recognize that these two methods only reveal subscriptions obtained directly through an app. Subscriptions acquired from other sources but later linked to an app are not displayed here. These can often appear on bank statements as payments to “Apple.com.” Therefore, it’s advisable to review financial records for those recurring charges originating from other providers, which must be canceled directly with them. For instance, subscriptions to Peacock and MLB.TV may emerge as “Apple.com” charges on statements, whereas a Netflix subscription purchased straight through Netflix retains a distinct appearance in your financial records.
Moreover, the Subscriptions page provides an option to enable Renewal Receipt Emails. At the bottom of the page, below your listed subscriptions, ensure this setting is activated. Doing so will allow receipts to be emailed to the address linked with your Apple ID every time a subscription renews. These detailed emails help in tracking the frequency and amounts of charges, offering clarity that typical bank statements often obscure.
Steps to Request a Refund from Apple
In instances where an app purchase or subscription renewal was unintended, requesting a refund from Apple is an option. Start by heading back to the overarching App Store homepage and finding the “Apps” tab, located at the bottom of your screen. Scroll to the bottom until you reach the section labeled “Quick Links,” where you will find an option to “Request a Refund.
This process is conducted directly through Apple, rather than the app developer, making it relatively straightforward. Tapping the link redirects you to a web page outlining the next steps:
-
Log in to reportaproblem.apple.com using your Apple ID.
-
Select “I’d like to,” followed by “Request a refund.”
-
From the dropdown menu under “Tell us more…”, indicate the reason for your refund request. Options include unwarranted purchases or cases of unauthorized transactions, but selecting “other” is also acceptable.
-
Identify the app or subscription in question and tap Submit.
You should receive an update regarding your request within 24 to 48 hours. While approval isn’t guaranteed, it’s certainly worth attempting.